
Trailer Modifications
- Escape 17B
Back to Jon Vermilye's Photo & Trip Page
Other
Trips:
1996 Trip Across the USA
2011 Trip Across US & Canada
Trailer Modifications - Escape 21
Here are some modifications & Additions I've made to my Escape 17B Travel Trailer. For those not familiar with the Escape, it is a small, single axle 2100 lb. dry weight (3000 lbs ready to travel) fiberglass "egg". While probably too small for many, I love the size. I travel alone, and it is large enough for me, and fits in just about any site, including many tent sites.
It has just about all the "stuff" in a full sized trailer (stove, 2 way refrigerator, bathroom & shower, air conditioner, furnace, stove, sink, etc) just more compact. Anyway, although I ordered the trailer with many of the available options, I've added a number of my own. Many were not necessary, but I like to putter, and always like to "tune" things to my wants & needs. If you read through the entire page you will find that I just can't leave things be!
New Modifications for 2012
New Modifications for 2013
New Modifications for 2014
New Modifications for 2015
New Modifications for 2016
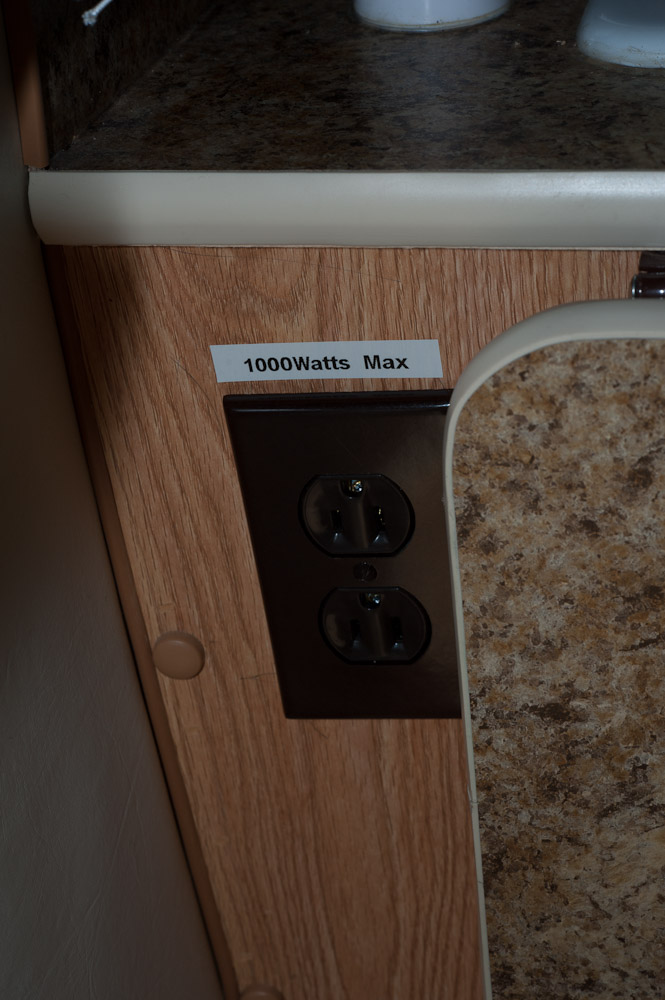
The first shows both the Progressive EMS-HW30C Surge Protector (now an option from Escape) & the Xantrex ProWatt SW 1000 watt inverter. While I installed the surge protector early this summer & it has shut down the trailer a couple of times because of low voltage & once because of reversed polarity, the inverter is new. I like to make a cup of drip coffee in the morning, and although the coffee pot didn't require a pure sine wave inverter, some things do, so that was my choice.
Rather than adding a transfer switch, I added a dedicated outlet on the side of the sink. The remote is located in the front of the sink cabinet.
While the ProWatt inverter remote will shut off the inverter completely, I added a heavy duty (200 amp) switch since I prefer to have a way (other than the fuse) to disconnect the input wiring to the inverter.
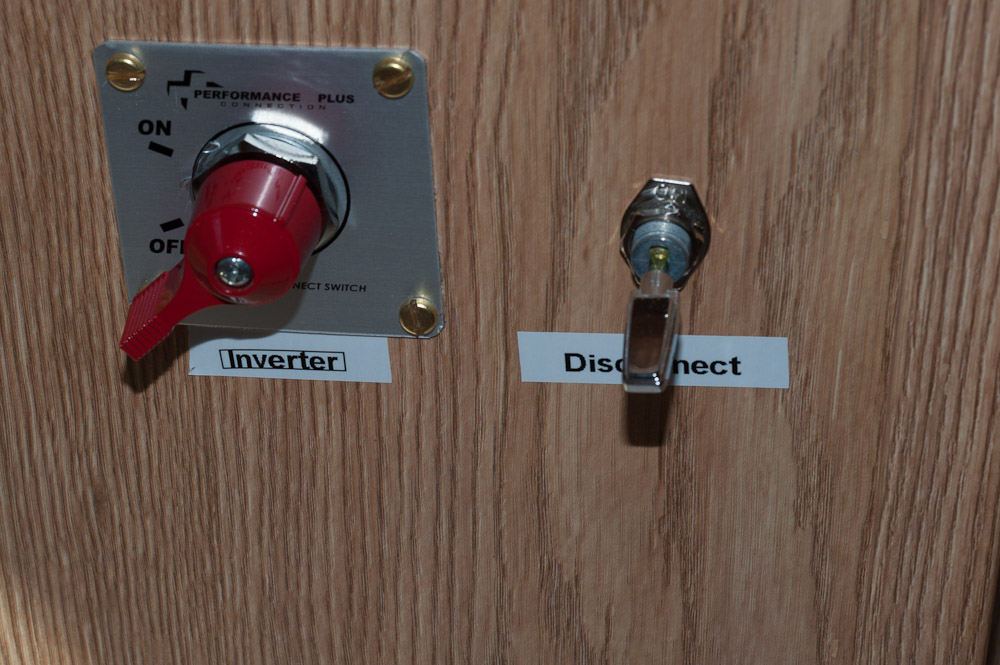
I also moved the trailer disconnect switch forward so that it is easier to reach when the dinette is made into a bed (something I have pretty much done permanently).
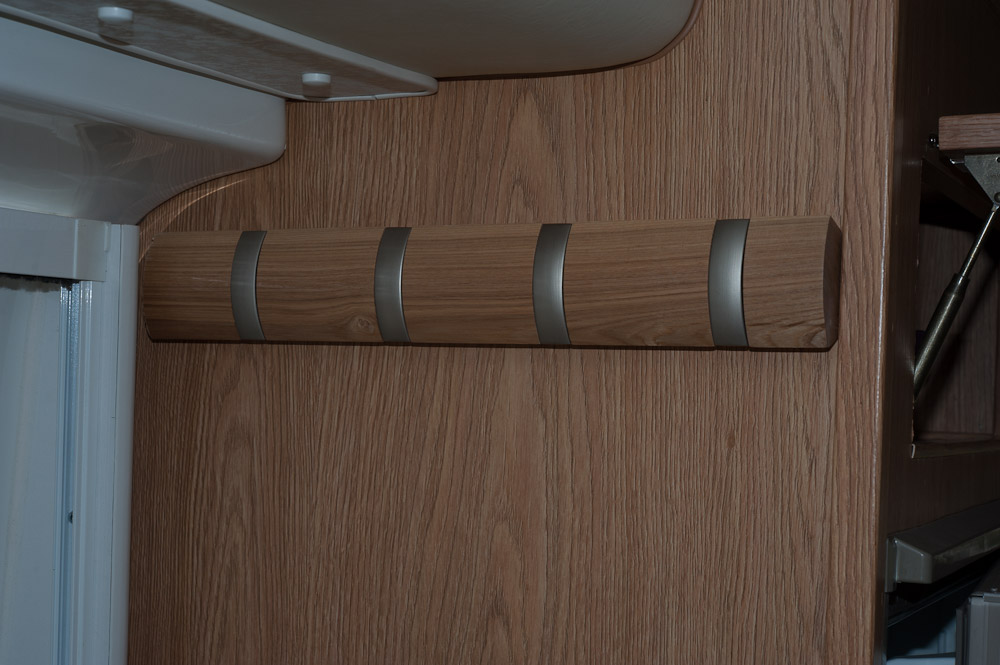
The next additions are some fancy hooks. I've been using the 3M temporary hooks, moving them around until I found the most useful locations for them. I was never sure the hooks would stay on the walls (although they did) so once I found a post on the Escape Forum describing Umbra Folding Hooks, I was "hooked."
The first set is on the refrigerator wall facing the exit door. I had to cut one hook off the length to make it fit & discovered that there is a steel hinge wire between the hooks. Oh well, I needed a new 10" fine toothed blade for the power miter box anyway!
The second one is on the bathroom wall next to the front dinette. The photo also shows the CO detector I added. I also changed the smoke detector to a dual sensor version that has a hush button - got tired of taking down the one that came with the trailer & stuffing it under the bed covers every time I made toast! I strongly support having all three detectors - Propane, CO, and a combined Smoke & Ionization smoke detector.

A minor addition is a mirror on the inside of the bathroom door:

I also changed a couple of the LED lighting fixtures for dual LED fixtures. One is at the head on the bed, and the other on the side of the front dinette where I usually sit. Although neither was necessary, I like to read & for some reason, the print on paperback books seem to be getting smaller the older I get!

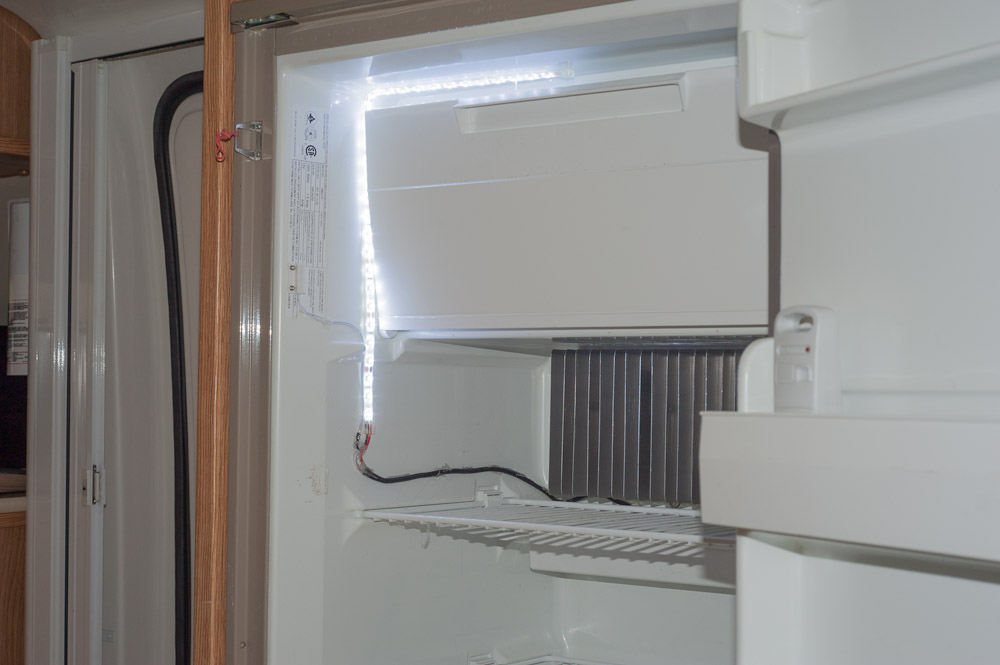
There have been a number of posts on the Casita Travel Trailer Forum (you may need to join to see the post) describing adding a refrigerator light - since my 5 cu. ft. fridge doesn't have one I thought it would make a good addition. I used a strip long enough that it could be run up the side & part way across the top above the freezer door, that way I have light in both parts. Probably should have used white wire to make it pretty, but black is what I had. If it bugs me enough I'll change it in the future (it did, and I changed it to a white wire). The addition includes a magnetic switch so it works like a normal one - open the door & it comes on, close it & out it goes!
A much more involved modification was adding adjustable shelves to the closet. It came with a closet pole for hanging clothes, however I rarely wear anything that needs hanging, and for the few shirts & jackets that do, I now have the folding hooks.
I wanted them adjustable because I'm not sure how much space I need on each. I went a bit overboard on the shelves - they are "stress skin"; 1/8" Luan plywood on the bottom & 1/8" White Cote Masonite Hardboard on top, separated by 1/4" hardwood strips. I've used the technique for building light weight theatre scenery & it makes very strong, lightweight shelves.

Here are two more changes - I added a square fence post to hold the sewer hose. The original was a 4" round drain pipe that wasn't large enough to hold a heavy duty hose with a right angle connection.
I also added a vinyl "LakeshoreImages.com" sticker to the back of the trailer.

The rest of the changes are not worth a photograph.
March 16, 2012 -
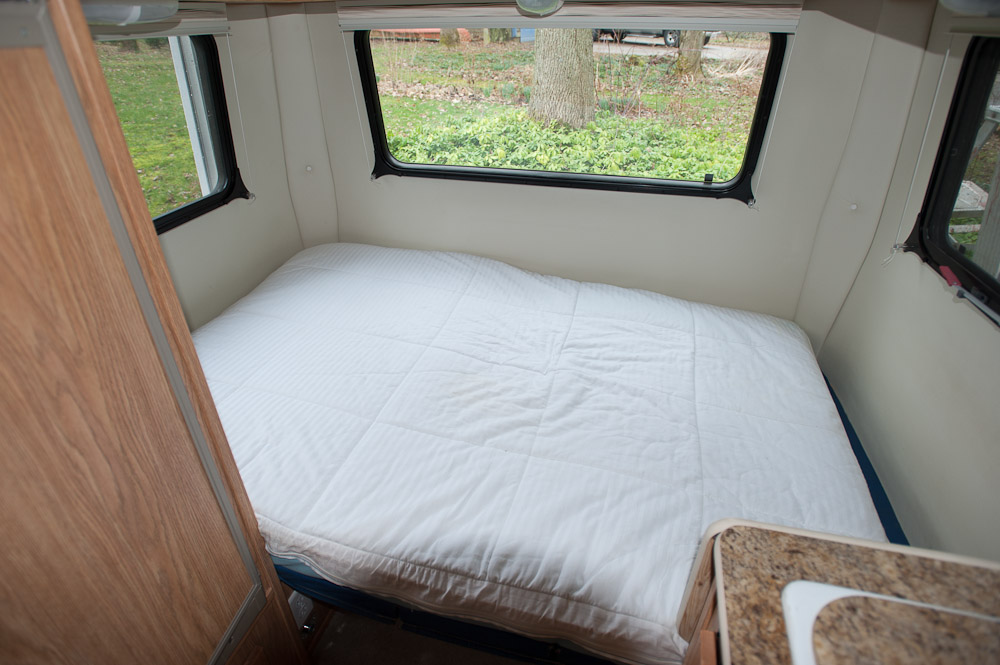
Well, a new day, a new project. As I've mentioned earlier, I don't use the 4 person dinette as a table, but leave it set up as a bed. In fact, I've removed the posts & hardware from the table both to save a bit of weight & so the laundry baskets I use for storage can slide underneath the bed.
While the cushions that are supplied with the Escape work well for sitting, they are too hard for sleeping. My solution for the last couple of trips has been to add a 2" Memory Foam Topper. That made it comfortable, but caused 2 minor problems - the folding table hit the topper and wouldn't fold to its normal storage position. In addition, the AC receptacle on the sink was partially covered by the topper.
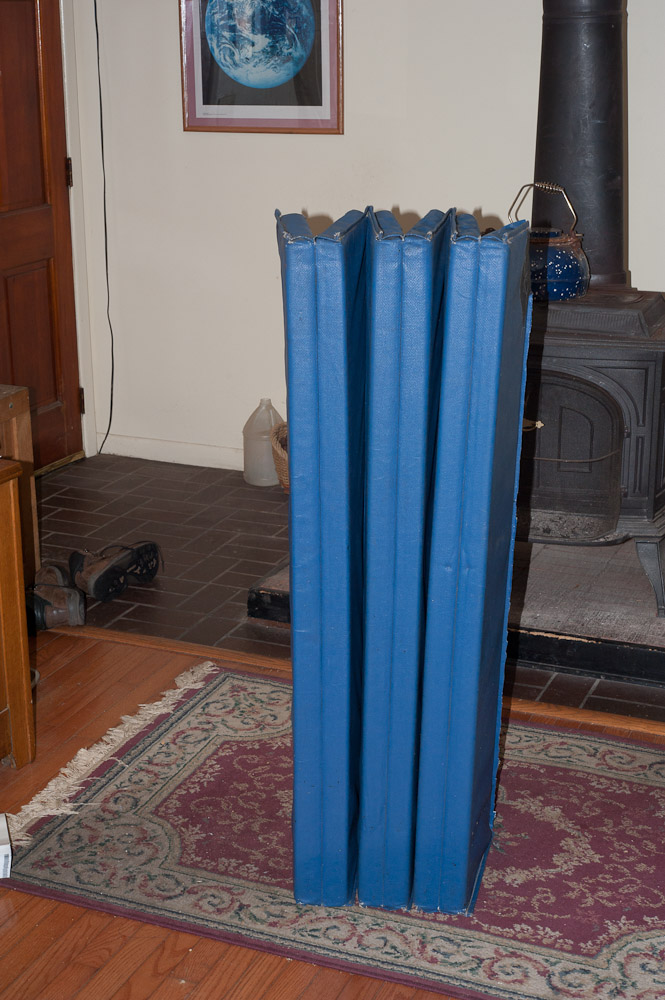
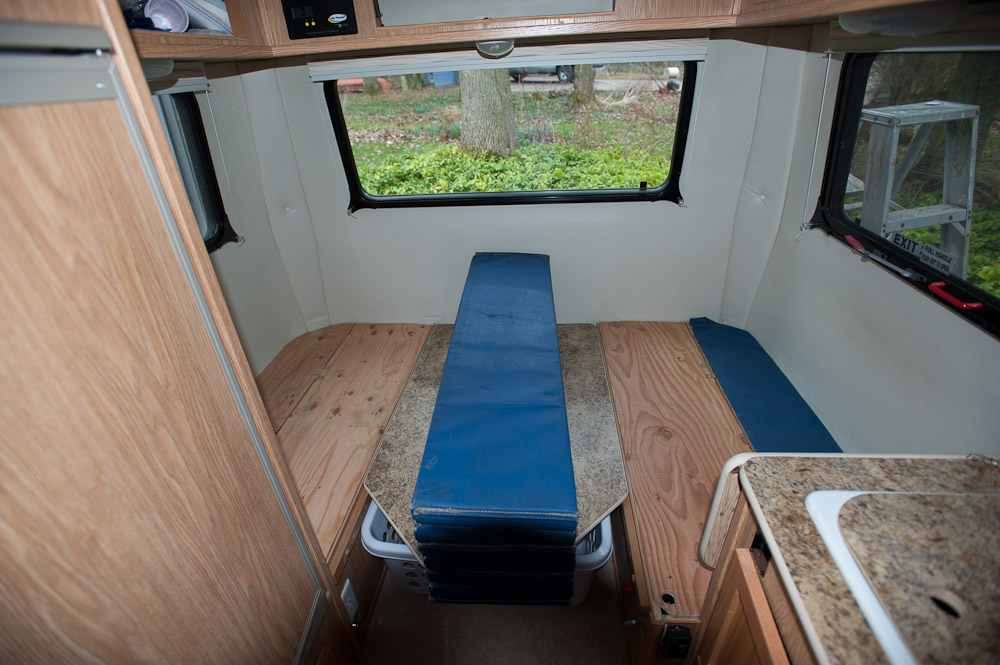
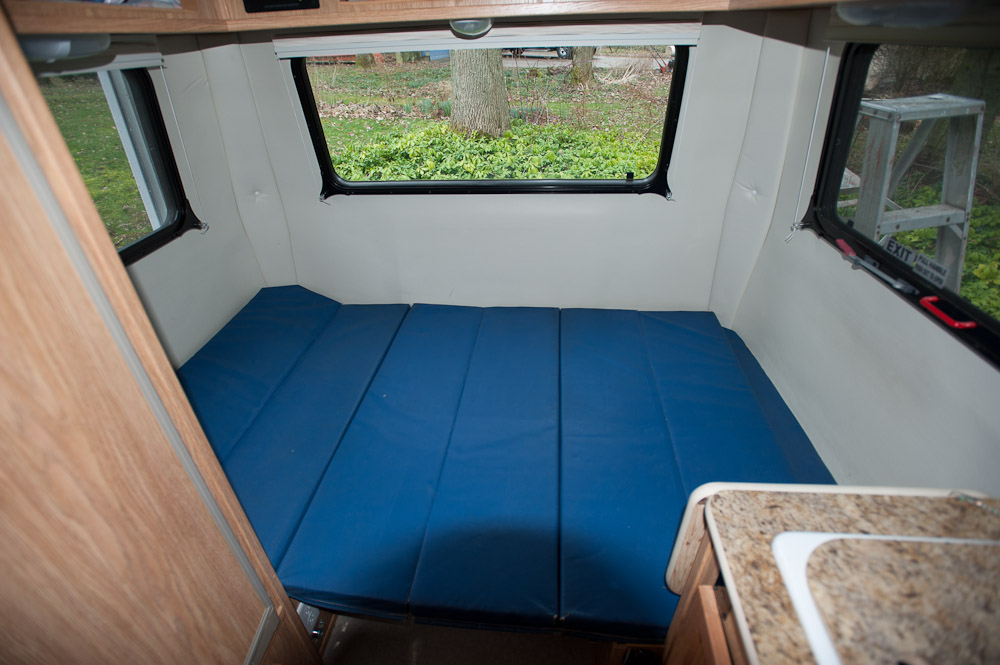
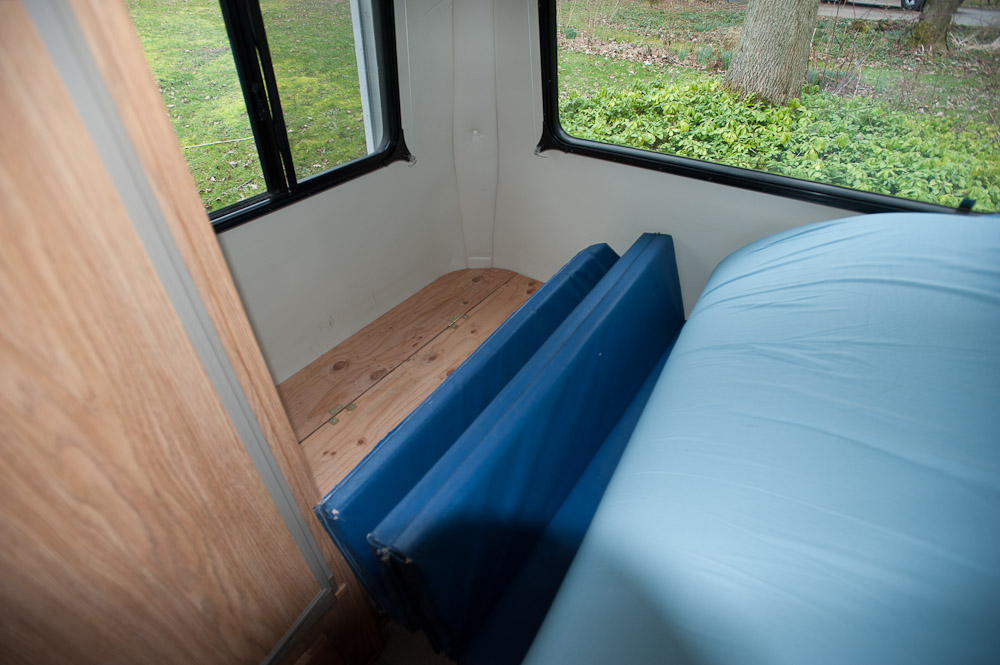
My solution was to replace the 4" cushions with a 2" gym mat. We used the gym mat under our air mattress when tent camping - it has a hard & soft side & worked well in the tent so why not try it in the trailer? I had to remove 2 sections & add a round to the top rear corner, but it was 4' wide & fit almost perfectly. Another advantage is it folds in sections, so it is easy to roll back the mattress/topper, fold as many sections as necessary, and get into the under seat storage areas.
 |
 |
 |
 |
The Gym Mat |
Modified to Fit |
In Place |
Folded to Open Under seat Storage |
I also added a raked mattress to make my doctor happy - some stomach problems I've been having seem to improve sleeping on a slant. I had to modify the topper cover to fit both it & the tapered mattress, but in the end it works, and is comfortable. That space at the bottom is on purpose - it lets my toes hang off the bottom!
There is one last project for me to start -
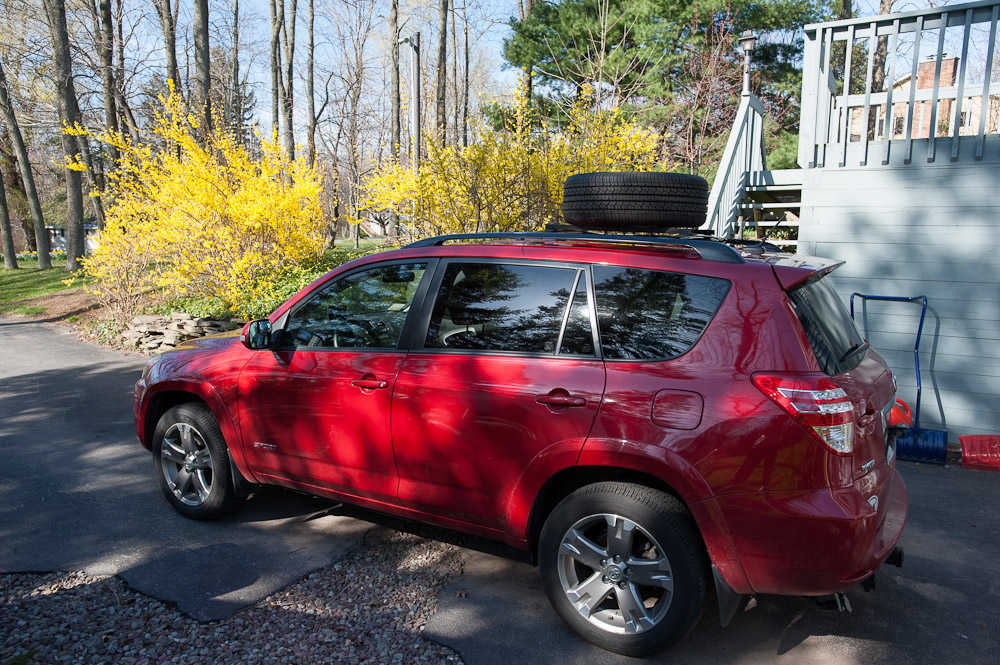
I've given up on the Run Flat tires that came with the RAV4 Sport model. As I've previously stated, it was a big mistake - the run flat tires are expensive, only last 20K miles, produce a harsh ride, and are completely useless in snow (while we didn't have a winter this winter, we usually get close to 200" each season).
I purchased a rim & 5 Goodyear Assure Gas Saver tires (for just about what I would have paid for 4 run flats). I'm building a mount to store the new spare tire on the roof rack. While it fits inside the back of the RAV4, it takes up too much space. Since I don't want to spend the $2000.00 quoted by the local junk yard for a RAV4 rear door with a spare tire "bump", let along the hassles of getting it painted, mounted, etc the roof looks good. I suspect it will hurt the gas mileage, particularly when the trailer is not attached, but if it is too bad, I can always move it back inside. Who knows, it may break up the air flow and improve things with the trailer behind it!
Well, I can now call the RAV4 the "Safari Wagon" (Yes, the forsythia are in bloom & it is March.) A very strange spring for Oswego! Anyhow, while not really a trailer modification, the job is done - Here is a photo of the RAV4 (A tire cover is on order):
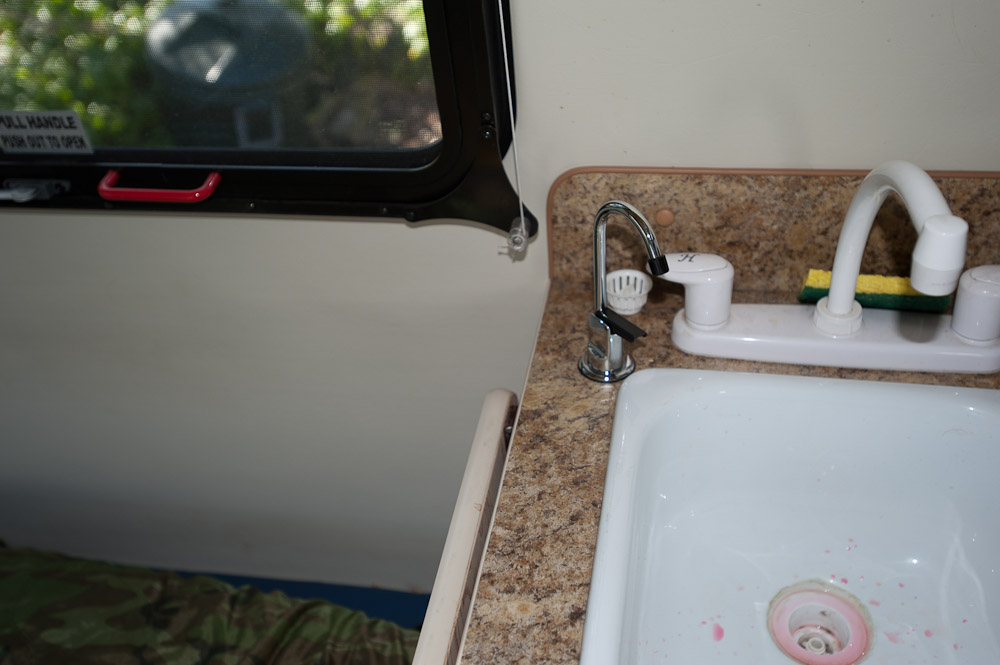
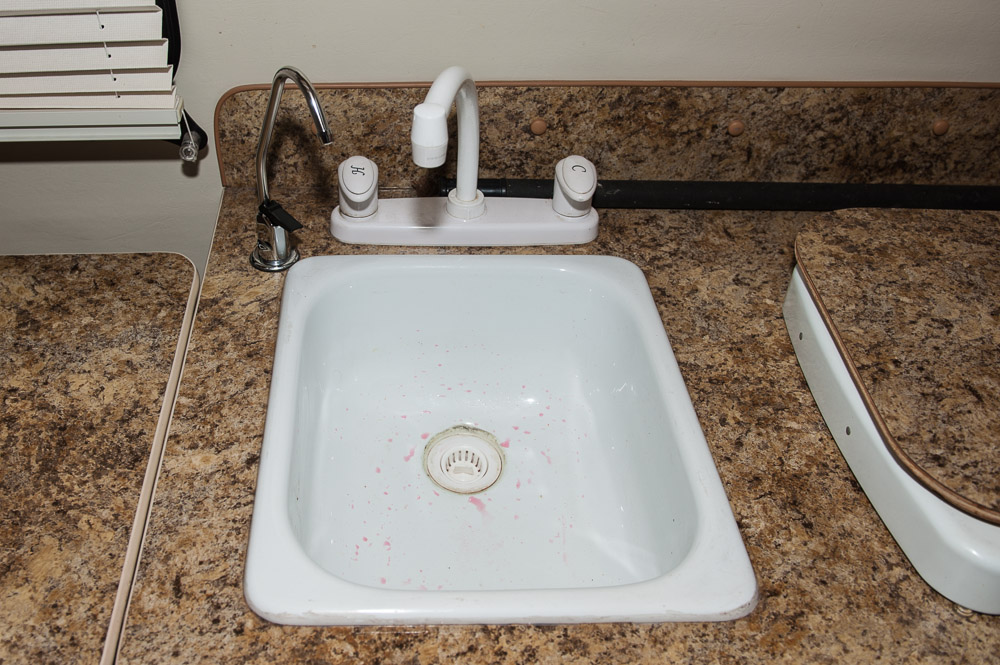
And, I definitely need to get started on this trip - I have too much time on my hands. I added a under sink filter to the trailer so if I hook up to or pick up some bad tasting water I can still enjoy my coffee. The first filter I tried was a Whirlpool one designed for refrigerators (there isn't enough room in the utility compartment for a standard under sink filter). While I liked the fact that you could change the Whirlpool filter with a 1/4 turn twist, it leaked at the "O" rings. I got on Whirlpool's web page, started a "Chat" session with them & they insisted that they didn't make the product (even though their trademark is on the instructions). Eventually, they gave me an 800 number to call to get help. Called, and they insisted that the refrigerator filter was a whole house filter. Eventually, they told me to go back to Loews & buy replacement "O" rings (this is for a brand new filter). Went to Lowes & they gave me a replacement cartridge to try - still leaked, so I pulled and returned it & replaced it with a standard in line refrigerator filter. More difficult to change, but for the amount of water I'll use it probably won't need to be changed more than once a year so it will work.
A photo of the filter is boring - here is one of the faucet:
Hopefully, this is the last addition to this page, at least until I get underway heading south!
While I haven't done any new modifications, I thought I'd add one that isn't shown here. I ordered my 17B with LED lighting, and combined with the dual 6V batteries & solar options, I love it. Still there is always the urge to "personalize" a trailer, so I ordered a strip of LEDs from Bulb America. I ordered This Version which is a waterproof 16.4' (15 meter) length of Cool White LEDs that have individual LEDs spaced about 2" apart. It can be cut between every 3rd LED. I ran a strip under the awning that provides an interesting night light:
 |
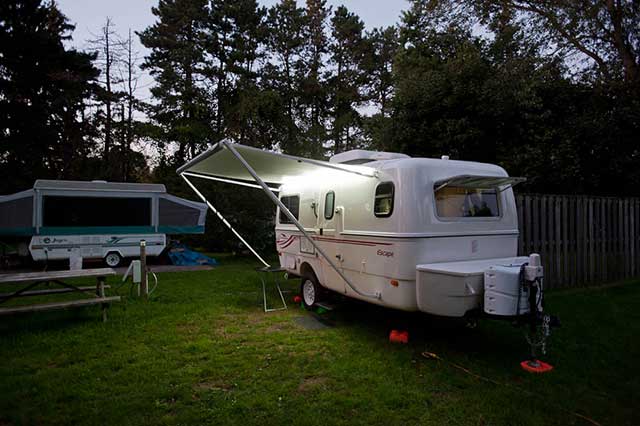 |
Look Under Awning |
Enough to Read By! |
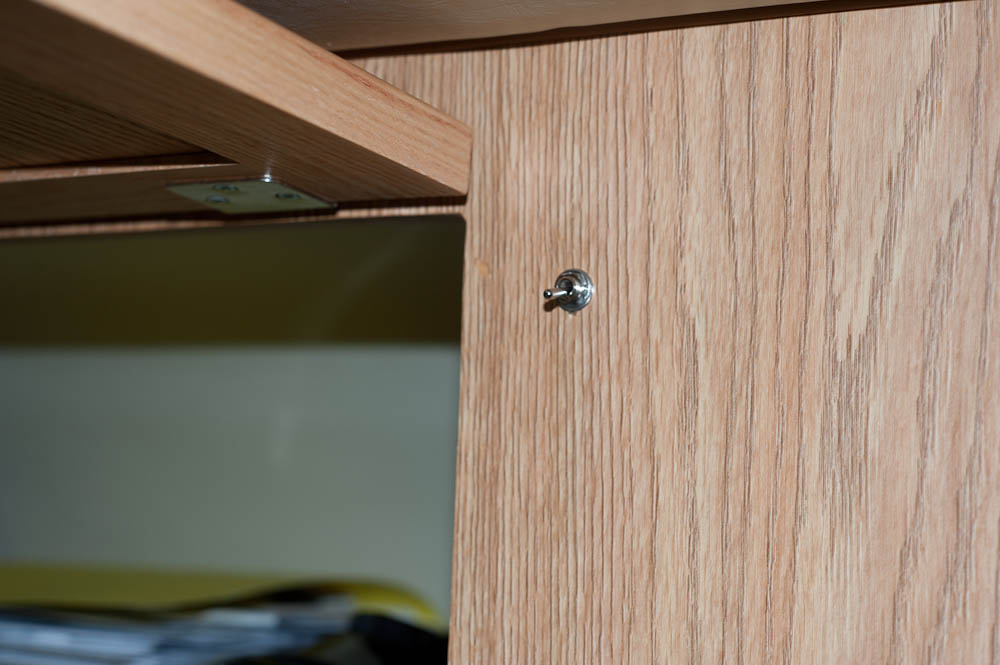
Of course, when I was done I had a fairly long strip left over. I managed to solve another problem with the trailer - seeing inside the upper storage compartments. Since my interior lighting is under the cabinets, they don't provide any light inside the storage bays. Even during the day it is sometimes difficult to see in the backs of the cabinets; at night is it impossible. My solution during the summer was to "buy" a half dozen Harbor Freight LED flashlights (they give them away with a coupon, although now they require a purchase) & I have a bunch of them. I left one in each compartment. It worked, but sometimes I'd end up with two in one bin and none in the one I was looking in, they eventually need batteries or fail (after all they were free) so I was looking for a better solution.
I made up a bunch of cabinet length strips from the LED strip I used for the outside lighting, added a switch for each cabinet, found a power source for each and now have great lighting:
 |
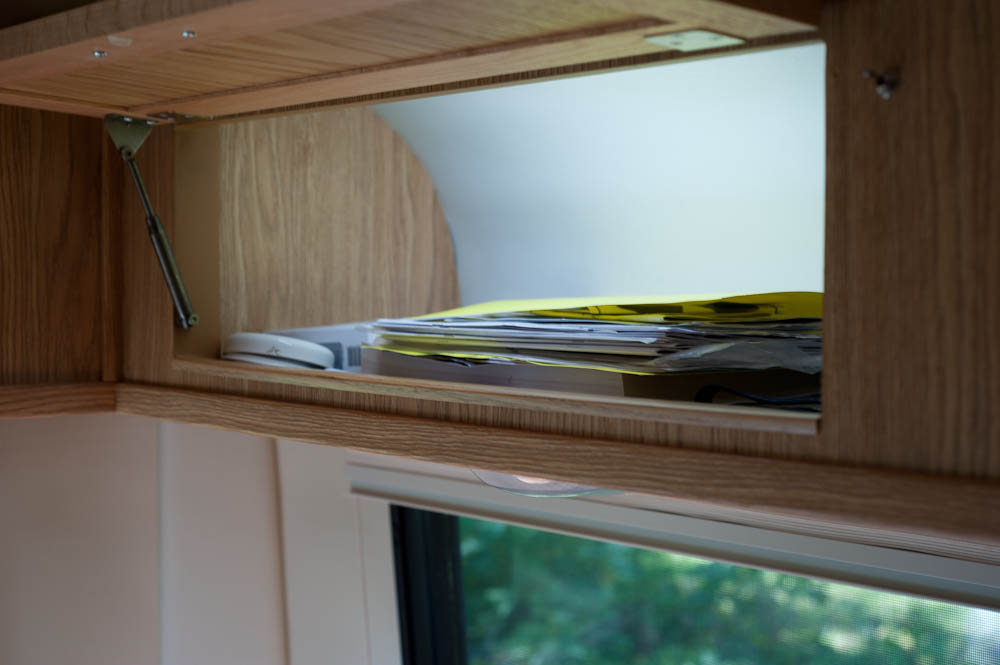 |
The Switch |
Lighted Overhead Cabinets |
Well I've found you are never "done" with a trailer! While I was quite happy with the trailer on my last trip 2012 Trip, there were little things that I could change to make living in the trailer better.
First, I discovered that while I still had the 2 person front dinette available, I rarely used it. Although I usually ate at the campground picnic table outside the trailer, when I ate in the trailer it was almost always sitting on the rear bed at the extension table next to the sink. I also often sat in the same place to look at a map or the campground information. While the lighting from the already installed fixture over the sink was usable, overhead lighting would be better, particularly for fine print. I had seen a post at the Escape Forum on adding a ceiling light to an Escape 19, so I decided to add one to mine. It is a bit more difficult in the Escape 17 since the Air Conditioner is between the fan & the location I wanted to add the light, but using a stiff wire as a snake I managed to run the wiring. The end result is a great source over the center of the area I generally sit. I believe that Escape has now made ceiling lights an option. If not, all you need to do is ask them - they are very accommodating to modifications!
 |
 |
The next change was minor - I had added a water filter & faucet to the sink since I wanted a source of filtered water when running on the trailer's water tank. I found it useful even in campgrounds that had water hookups since some of the water was of questionable taste. The only problem is the low faucet was difficult to get my coffee pot under. It worked, but I had to tilt the pot, making it difficult to determine the fill level. So, I replaced it with a taller faucet.
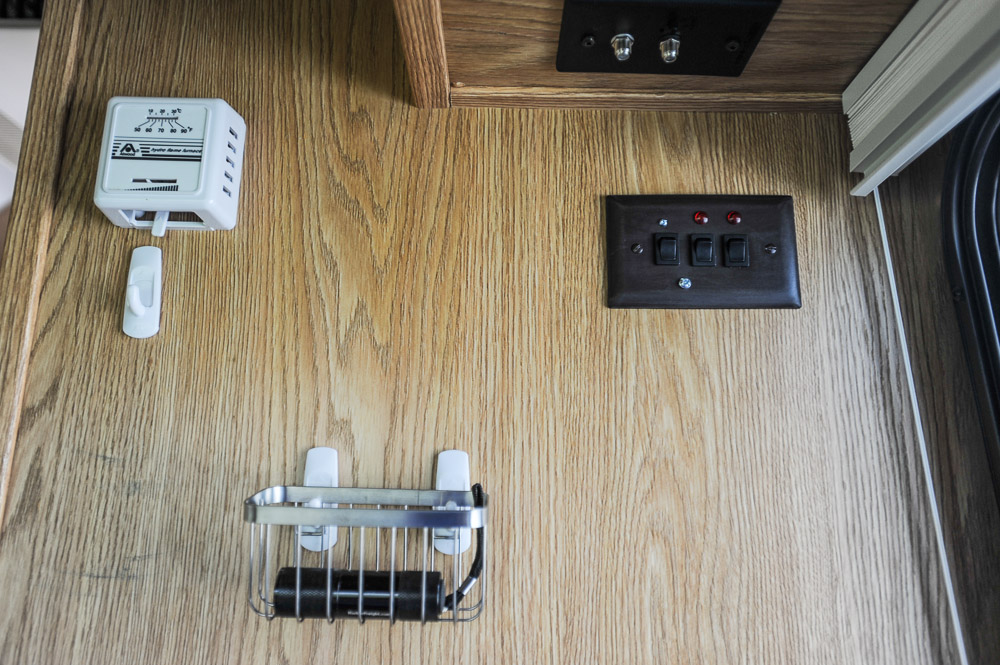
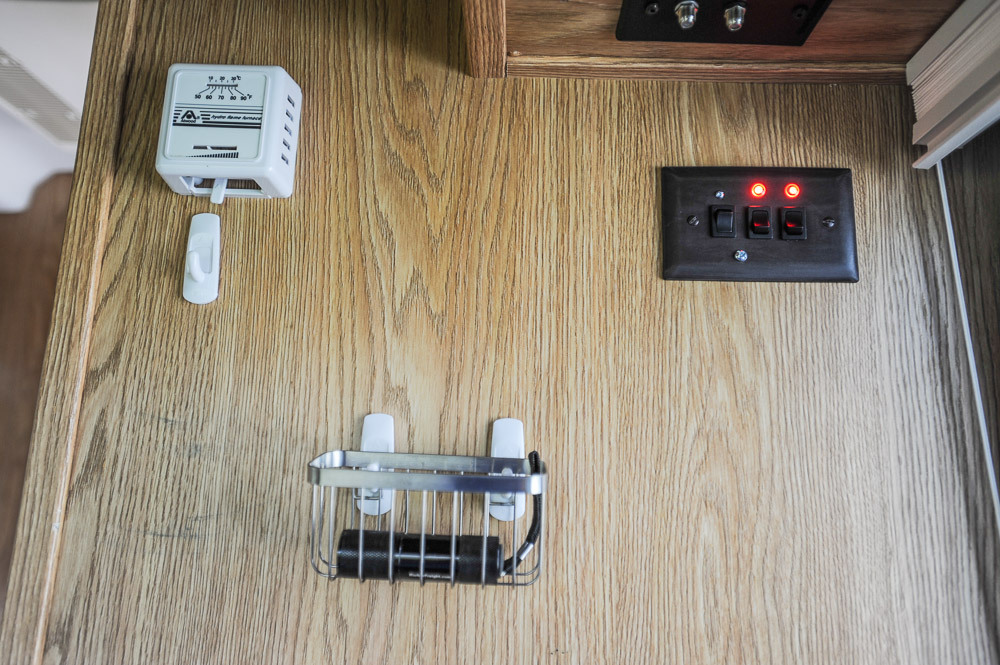
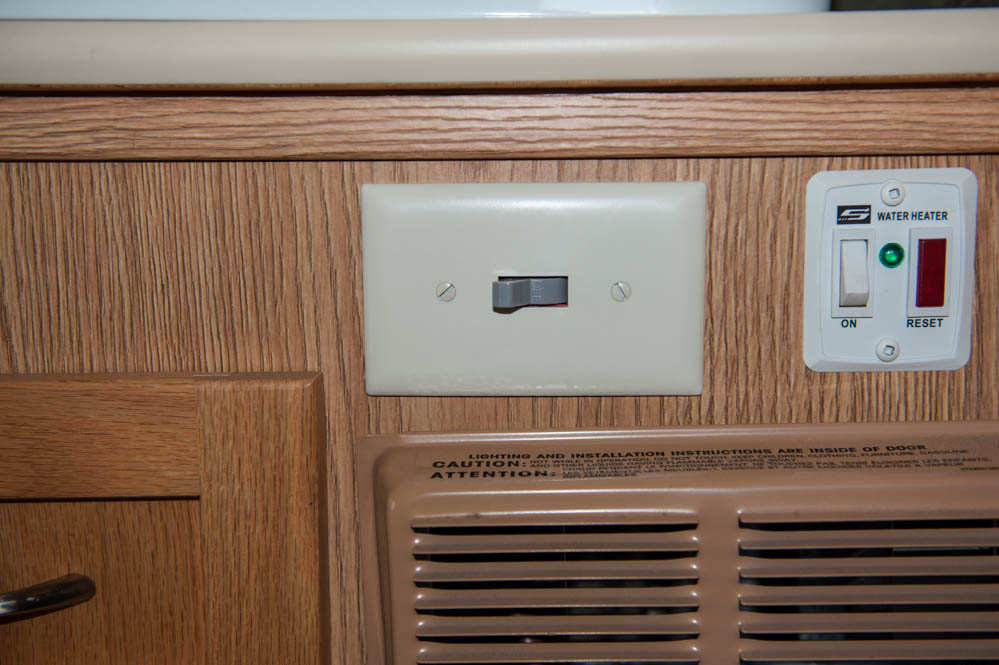
The last (well, I actually should know better than to say last) was to add a "on" light to the water heater. The lamp on the stock switch lights when the ignition system is "lighting" the heater, but goes out once the water heater fires. Since I usually only run it when I need hot water, I found I sometimes forgot to turn it off, resulting in the water heater coming on in the middle of the night. (In the picture below, both lights are on, the green one was added - Since I have already drained the hot water tank, I didn't leave it on long enough to start.)

The only other change isn't worth a photo - I cleaned up the wiring for the refrigerator light, the refrigerator fan, and the strip lights below the awning. I also changed the upper refrigerator grill for the new one Reace gave me when I stopped in Chilliwack, BC to have the "refrigerator from hell" fixed. By the way, it has been working fine since!
OK, it is spring, and warm enough for the trailer cover to come off, so it is time to make some more changes & additions. While I love the Escape and its standard equipment and factory supplied options, I love to "tune" my trailer to my needs & desires.
While I don't carry a bike, and so far haven't felt the need for a generator, I want to be prepared for each. I had the "bike rack ready" option installed when the trailer was built, which consists of a 2" receiver on the rear bumper. If I do get a generator I plan to store it in a receiver mounted storage box so adding upper taillights makes sense. This is now a factory option from Escape, however they are 3000 miles away, so I ordered a pair & installed them myself.
An interesting discovery - while the standard wire colors for trailers use brown for taillights & green for the right turn / brake light, Escape switches them. After some internet searching, I discovered that Scamp does the same. I'm not sure why, or how many other trailer manufacturers do the switch, but in any case, I had to wire the upper lights twice to get everything working.

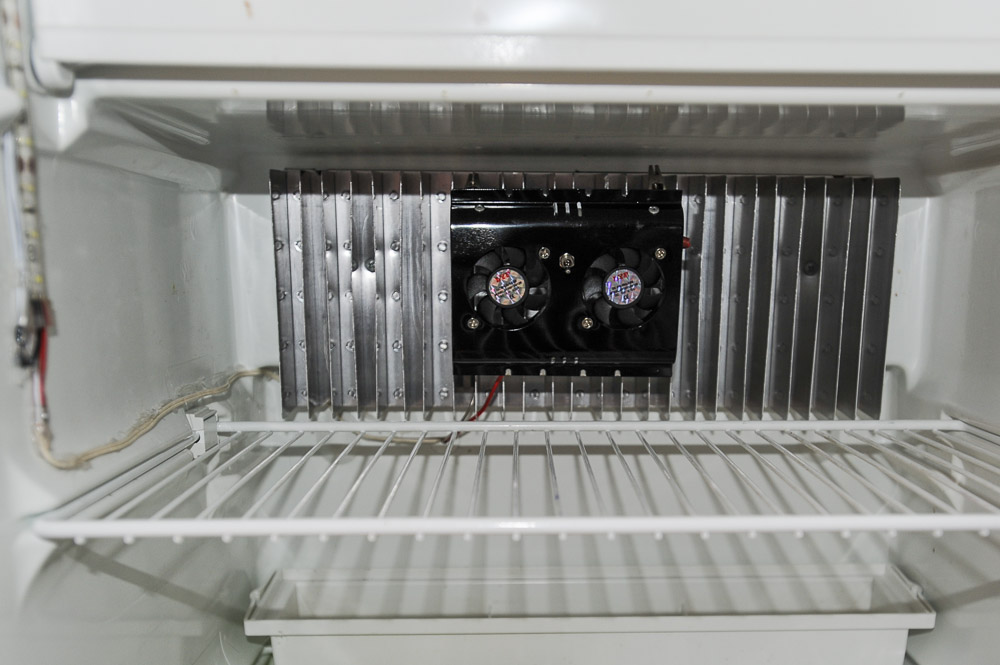
A minor modification was to add a 12V fan to the interior fins in the main section of the refrigerator. While I have a battery operated fan I used last year to move air around inside, I'm hoping this one that attaches to the fins will help keep them from frosting up as much as they did during hot weather.
(After a 37 day trip with the new fan, I found it works much better at distribution cooling throughout the interior of the refrigerator, and helps quite a bit at preventing frosting of the cooling fins. I still had to defrost the refrigerator once during the trip, but with the prior set up I had to defrost every 2-3 weeks.)
I have two rewiring changes. The first is caused by a combination of new cell phone technology, and my breaking a ground plane radial while preparing the trailer for its cover last fall. I ordered a replacement cell phone antenna that covers 4G LTE frequencies. While my old antenna might have worked, with one missing radial it wouldn't work as well as designed.
Since the antenna run is behind the shower it is a difficult rewiring job. If I had thought ahead, I would have asked Escape to run a piece of plastic 1" conduit from the cabinet behind the shower to the one in front of it when they built the trailer. That would have made changes much easier. It took quite a bit of fishing around, even using an inspection camera to find a path, but I did manage to get a pull cord from back to front.
I haven't decided if I am going to make the switch from 3G to 4G service - Millenicom, my provider offers 20 GB of 4G Verizon based service for only $10.00 more per month than my current 3G plan, however they use a MiFi unit rather than a USB stick. Since I'm set up with a WiFi Ranger router, the MiFi is not as useful a solution. For one thing, I'm not sure the WiFi signal from the MiFi is strong enough to reach the dashboard in the tow vehicle, and relaying the WiFi signal from the MiFi through the WiFi Ranger would slow things down quite a bit. Once 4G is everywhere, the speed loss probably wouldn't be all that much a problem, however I'm still finding far more 3G or slower locations, so, for the time being, I'll probably stick with 3G.
(Well, I did switch to the 4G MiFi unit (See a post further down the page). Haven't used it very much yet, but will post whether it was worth the extra $10.00 after the next trip.)
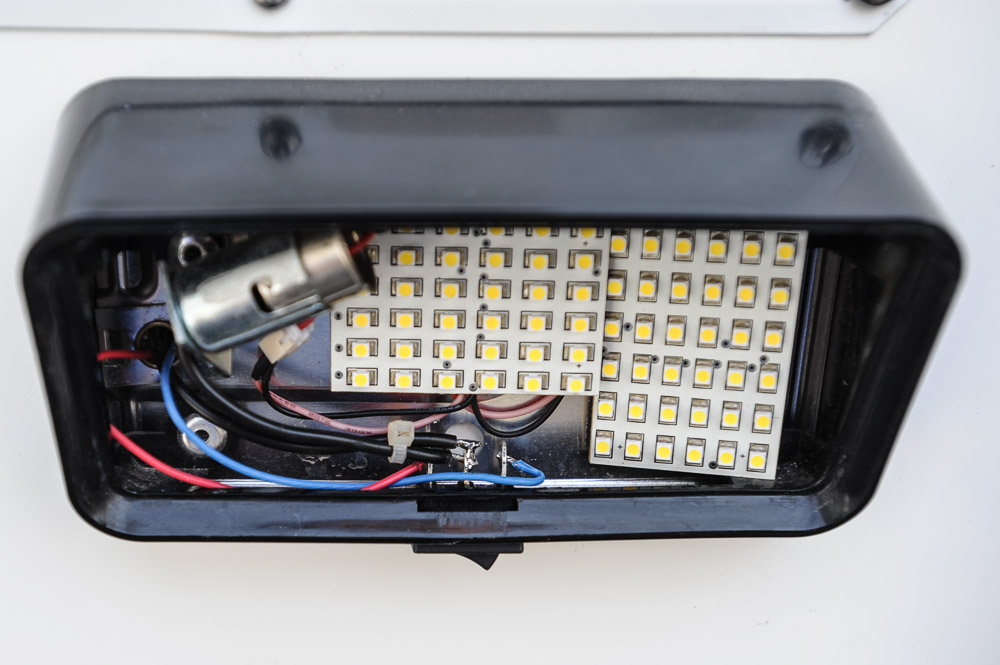
The other rewiring project also involves pulling some wire, however a much shorter run. One thing I discovered during my last trip was that a couple of times I left the porch light on after hitting the sack. Since the switch is in the bottom of the fixture, you need to go outside to turn it off. There are also times it would be useful to turn it on from inside. I decided to replace the single pole switch built into the porch light with a two pole switch & wire it the same way a household 3 way switch is wired so it can be turned off & on from either location. The idea came from one of the Casita Forums. Here is a source for the switches that are a snap in replacement for the one used in the Escape, and most other Bargeman fixtures. You want item 7500005, 2 if you are going to use the same one inside.
 |
 |
 |
 |
Porch Light with 3 Way Switch |
Interior 3 Way Switches - Off |
Interior 3 Way Switches - On |
Outside Strip Light Switch |
As long as I was rewiring the porch light I also did the light strip I added last year, and replaced the outside switch for the external refrigerator fan with one on the same switch plate, and added an indicator lamp wired in parallel with the fixture lamp so I could easily see if it was on or off. I had to build a custom switch plate - I sure do miss my full wood, electric & metal shops that I had available prior to retiring from the Theatre Department! Anyhow, after lots of drilling, filing, soldering, and more inspection camera work to find a path, I can now switch the lights from either location.
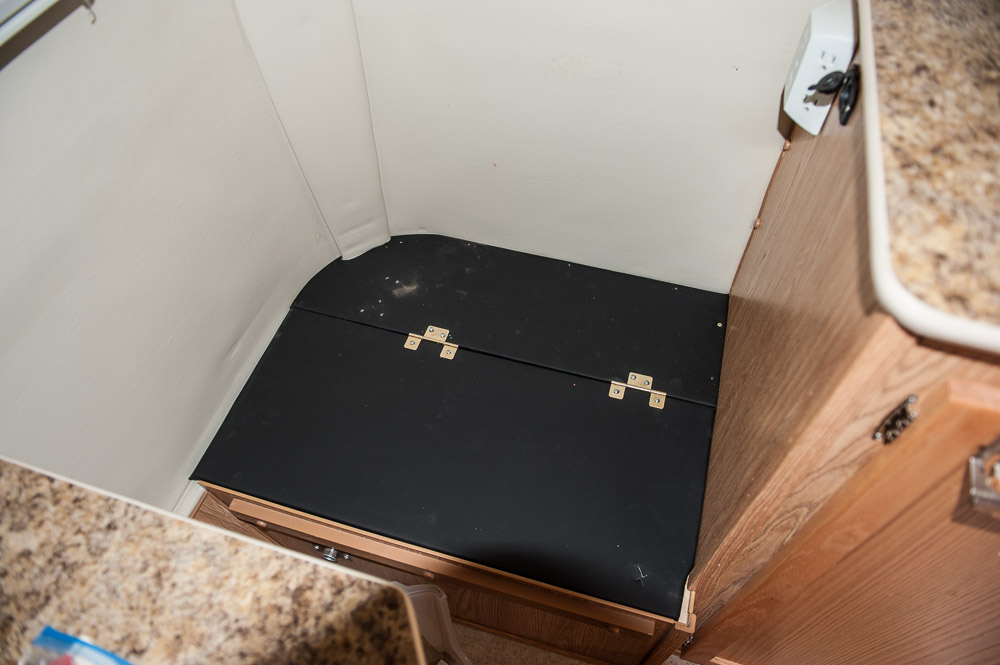
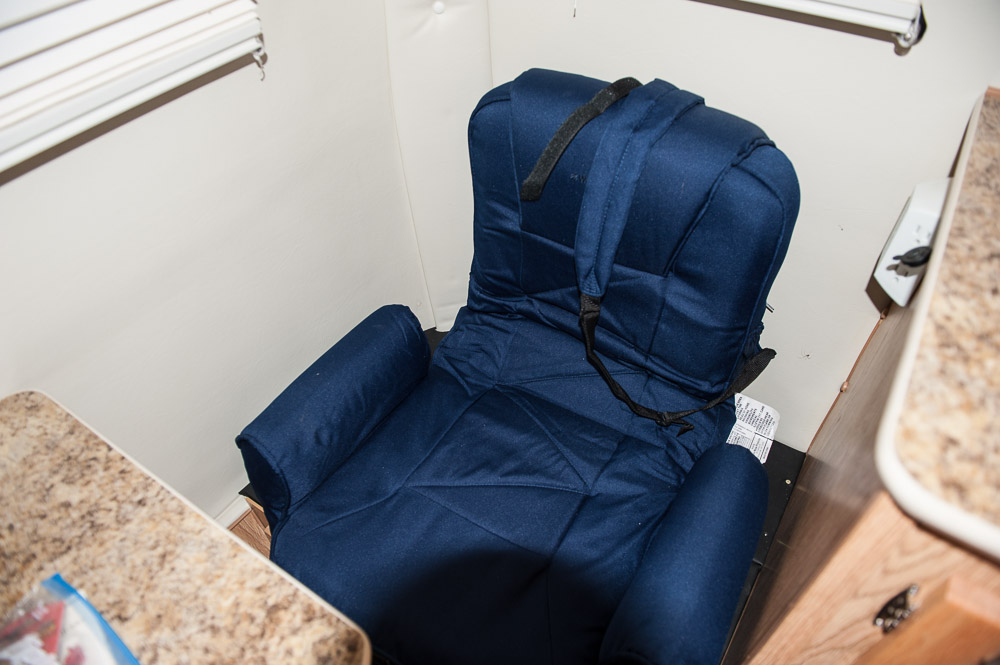
I'm also adding a cover to the plywood seat on the passenger side of the front dinette. I purchased a West Marine High Back Chair and plan to use it as a replacement for the seat & back cushion supplied by Escape. The high back is much more comfortable than the standard cushions.
Here are the photos of the last of this Spring's modifications Sorry about the shadows in the hatch & chair images - I had a fairly large lens on the camera & it blocked part of the on camera flash..
 |
 |
 |
Vinyl Plywood Hatch Cover |
The West Marine Chair in Place |
Short Trucker Cell Antenna |
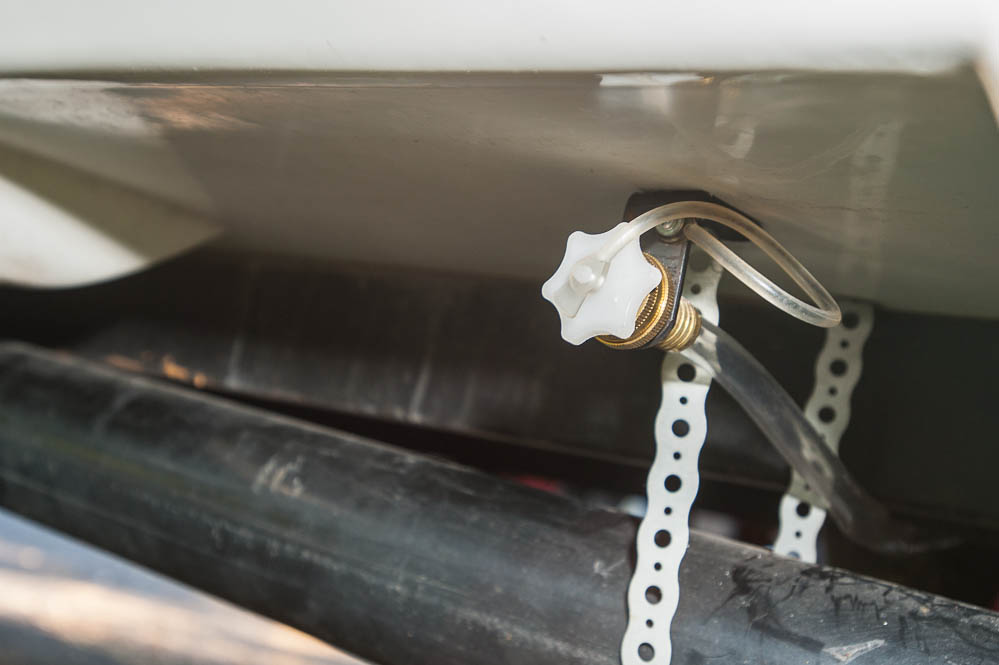
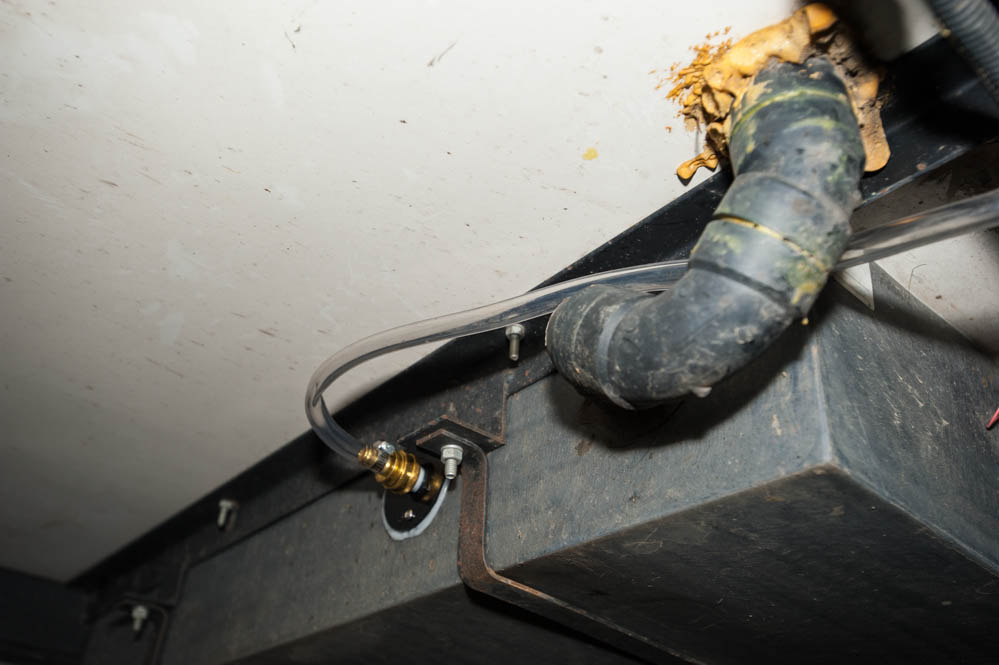
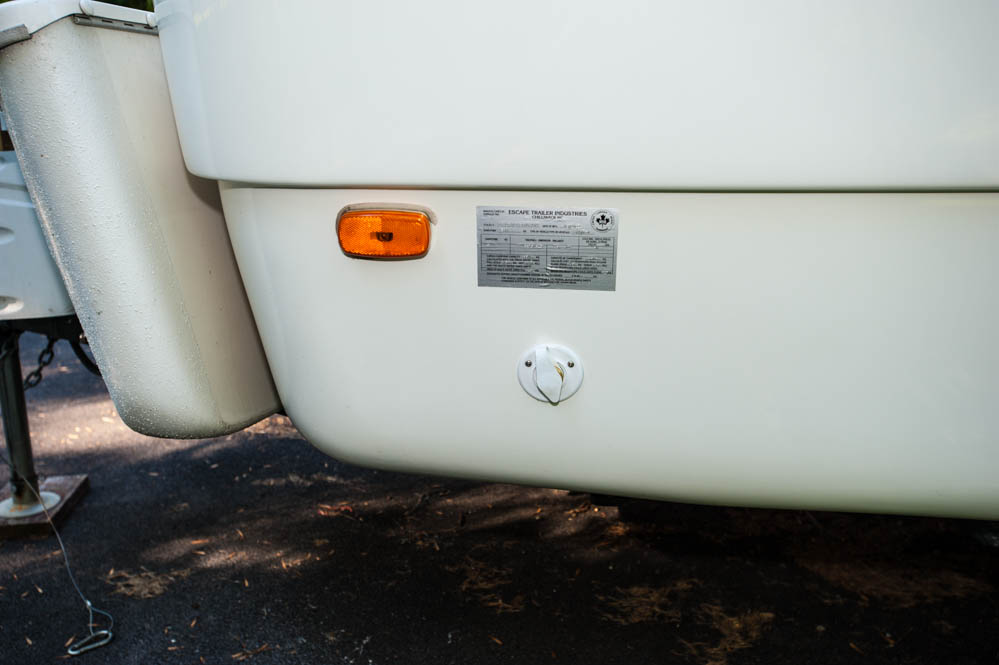
I made a couple of additions after a summer trip to Nova Scotia. Like most RVs, the black & gray tank indicators are pretty near useless. I don't use them all that much, but I still wanted a way to clean them that was easier than hauling a hose into the bathroom or sticking a wand up the gray tank outside drain. So, I added a tank rinse system to each tank. The gray wash is a simple sprayer, and the black tank is a more expensive Tornado sprayer. I used the stock hoses & connectors for the gray tank, but since the black tank is wholly inside the trailer, I used a fresh water inlet (with a back flow preventer) to feed through the trailer wall and standard PEX fittings to connect the water line to the tank.
 |
 |
 |
 |
Gray Tank Inlet |
Gray Tank Connection |
Black Tank Inlet |
Black Tank Connection |
It was a little scary cutting a 1 1/4" hole in the side of the trailer, but there is no other way to get at the black tank, at least that makes sense. I used a hole saw for both the trailer shell and the tanks & it did a great job. While the instructions said to use silicone caulk to connect the spray head to the tank, I refuse to use silicone anywhere in the trailer. I used ProFlex Geocel Water Shield, a non silicone based paint-able and extremely adhesive caulk. I have used it for a number of things & found it to remain flexible years after applying. I suspect it is the same formula as ProFlex RV, made by the same company, but since packaged for RVs, more expensive.
A minor modification - After a trip to Nova Scotia that included rain for 20 of the 37 days, I discovered the gym mat under my mattress was damp, not from leaks, but from nighttime perspiration. To allow the mattress to "breathe", I added a section of DryMesh between the mattress & the mat as well as the side walls of the trailer. This is a 1/2" anti-moisture layer that can be easily cut to fit the mattress.
Another minor modification that I did before the Nova Scotia trip was to make this adapter:
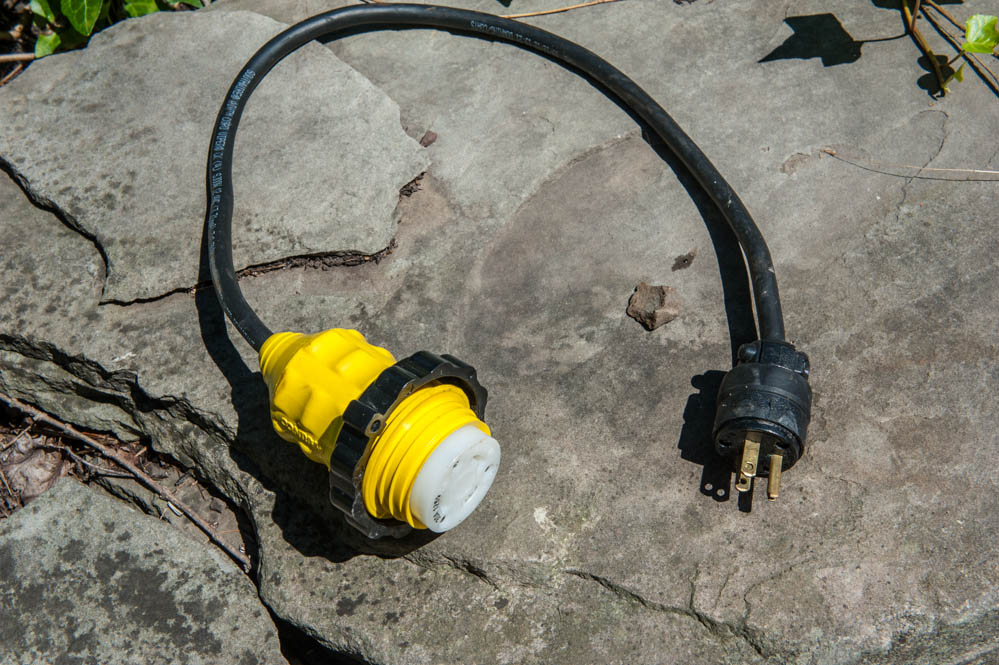
While I carried & used the standard 30 amp to 15 amp adapters on past trips, I had some problems with some of them, and since I always carry a 30', 20 amp extension cord in the RAV4, this made sense. It also lets me carry a replacement Marinco connector, something that would be difficult to find in some parts of the country.
Some additional minor modifications include adding a switch to the refrigerator lights I added last year so that rather than unplugging the supply line I can switch it off when propping the door open when storing the trailer.
 |
Refrigerator Light Switch (Left) |
The other minor modification was to add a shut off valve to the toilet feed line in the storage compartment under the driver's side front dinette seat. I have heard too many stories where the toilet valve failed, requiring shutting down the entire trailer water system. While I only had one incident of the valve leaking (thank goodness it was a slow leak - I found it by sitting down on the toilet in the middle of the night and splashing (I know, too much information!)) Anyhow, it now can be isolated from the rest of the trailer water system.
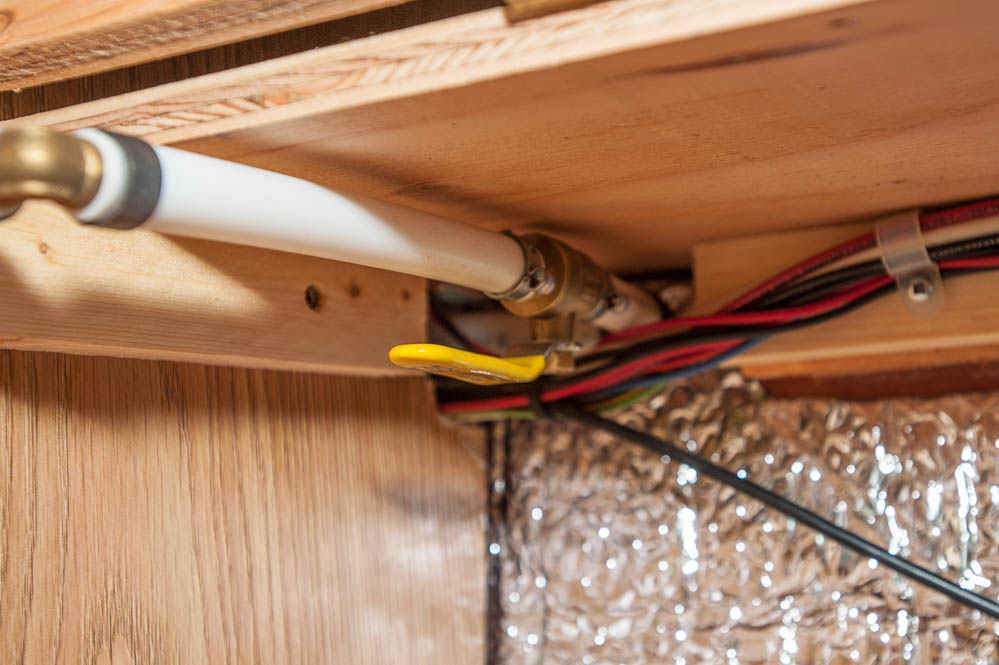 |
Toilet Shut Off Valve Addition |
Another change has been switching from Millenicom's 20 GB per month 3G plan to their 4G plan. Both use the Verizon network, however the 4G plan switched from a USB stick to a MiFi unit. While at $69.99 per month it is $10.00 more than the old plan, there are enough 4G towers that I hope it will be worth the extra cost. I am amazed by the gain that the Sleek amplifier combined with the Wilson Trucker antenna provides. Here at my house (a poor Verizon coverage area) I have -101db of signal using the MiFi unit alone. Placing it in the Sleek cradle increases the signal level to -80db, a 21db gain. I still have to do a bit of driving with the trailer attached to determine if the MiFi WiFi signal is strong enough in the RAV4 to let me use the system while driving. If not, I'll have to find away to increase the signal level. The photo shows both, but is not in its permanent location.
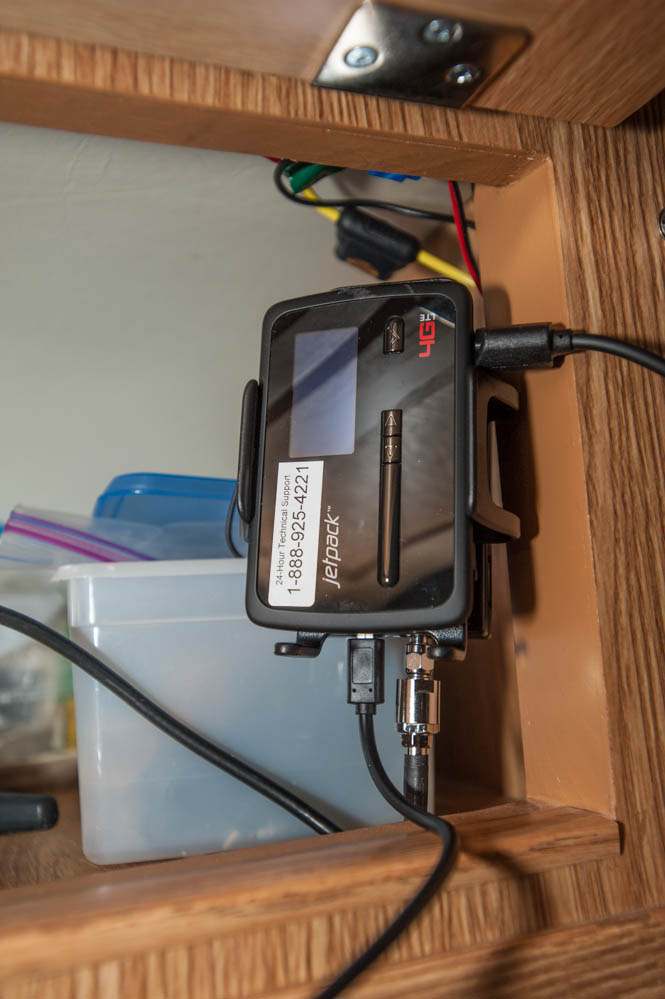 |
MiFi & Sleek |
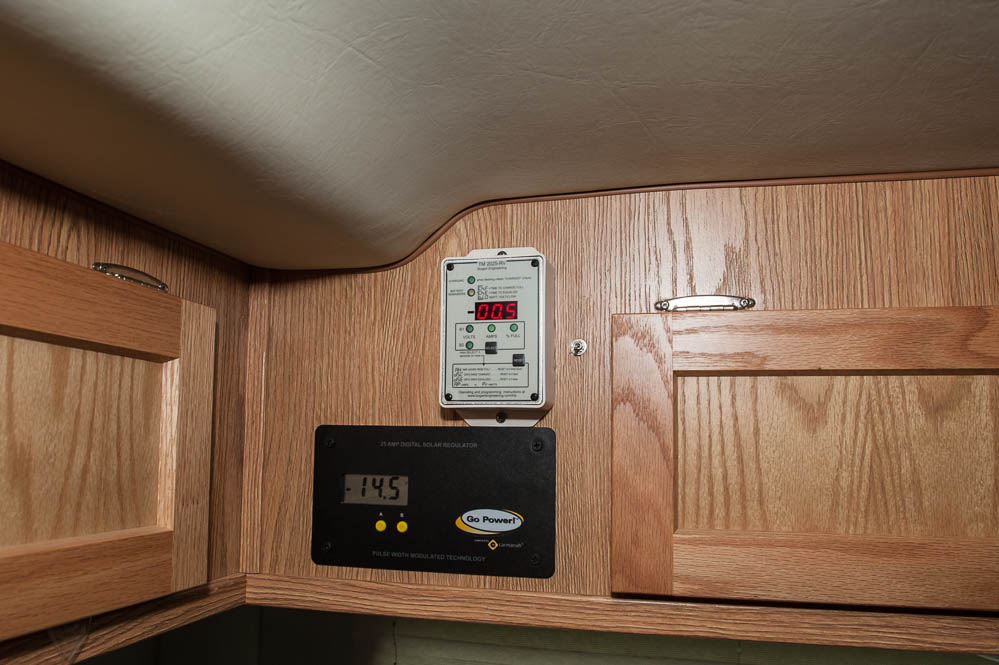
And finally (just kidding - there is never going to be a finally!) I added a Bogart Engineering Tri-Metric TM-2025-RV battery monitor. While the GoPower controller for the solar panel does indicate battery charged per cent, it is only a voltage measurement, something that is not all that accurate. The Tri-Metric actually measures current in & out of the battery. Since it has been set for the Amp/hrs of the batteries, it is a far more accurate indicator of the state of charge. Since I often stay in sites that do not have hookups, it will be good to have a better idea of the battery state. While installing the meter itself is a minor job, it uses a shunt to measure current. Since that must be in the negative battery cable, it is a major wiring problem since I have #0 battery cables to accommodate the 1000W inverter. I did find a location for the shunt that only required adding 1' of #0 wire.
 |
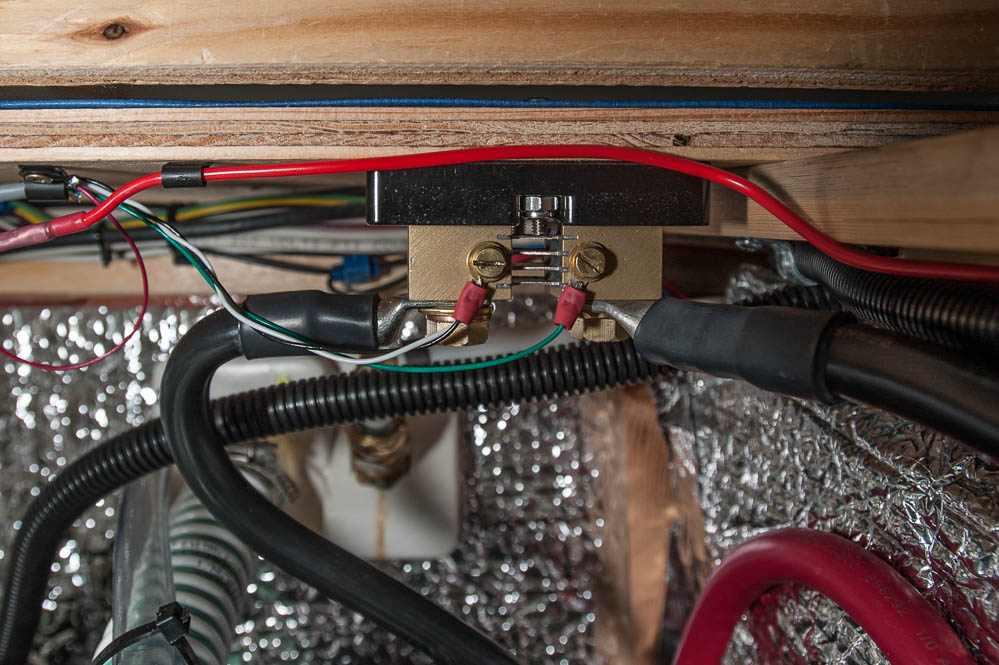 |
Tri-Metric Meter |
The Shunt |
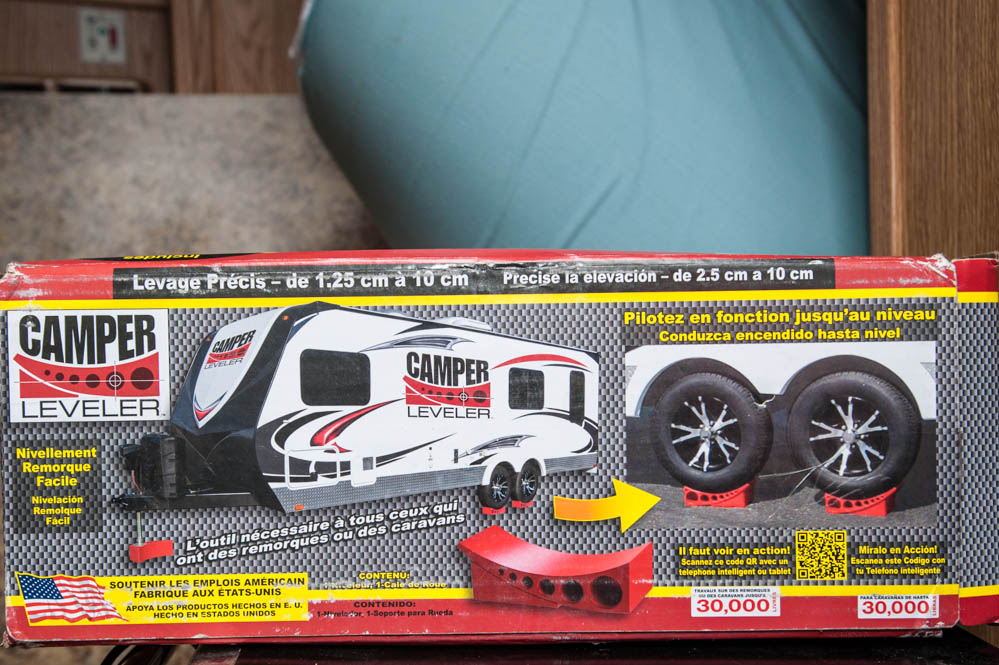
I told you I was just kidding - here is one more change, although a minor one. I got tired of stacking the "Leggo" style leveling blocks, so I purchased an Anderson Leveler (Warning - a YouTube video). Sorry, I took the photo of the French side of the box.
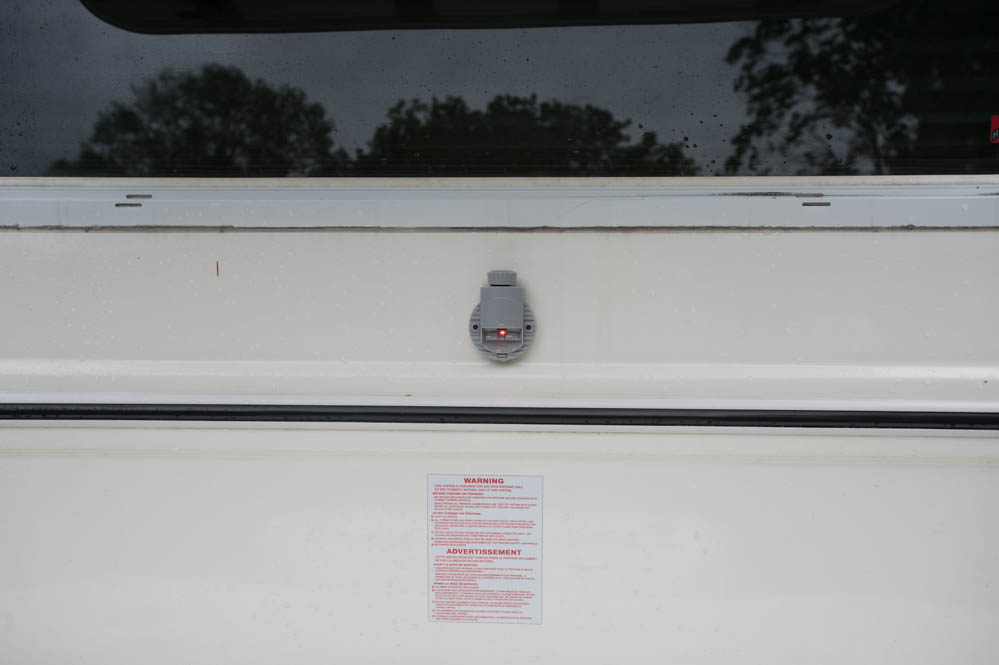
While it is very easy to use (just put the curved wedge behind the low side wheel & back up) you still need to hop in & out of the tow vehicle to see when the trailer is level. The solution? a Hopkins Lighted Level. The level has a LED built into it that makes the bubble glow bright red, but only when the bubble is between the level lines. Bright enough that you can see it in the tow vehicle's rear view mirror. The combination of the Anderson Levelers & the lighted level works great!
 |
 |
 |
Anderson Leveler |
Light Off |
Light on & Trailer is Level |
Until the next time!
It's Next Time (September 25th).
Nothing major, but some added conveniences.
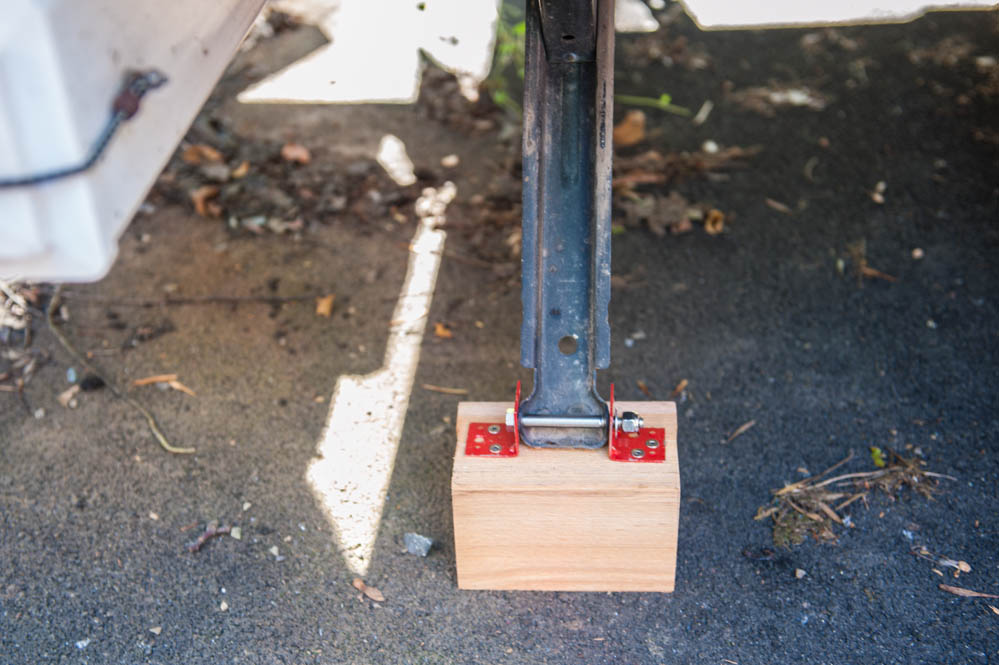
First, I added some 4" X 4" blocks to the stabilizers. Because my trailer has the high lift axle, I've found that at most campgrounds I need to add 5-7 "Leggo" blocks to contact the ground. Hopefully, these blocks will make for faster setups. Whether this is a good idea or not will depend on clearances. No problem with the rear since in the up position the block is higher than the sewer hose storage. In the up position, the front blocks are the lowest part of the trailer. Still pretty high, but if it appears to be a problem, I'll just leave them off since the front usually requires fewer Leggo blocks to set.
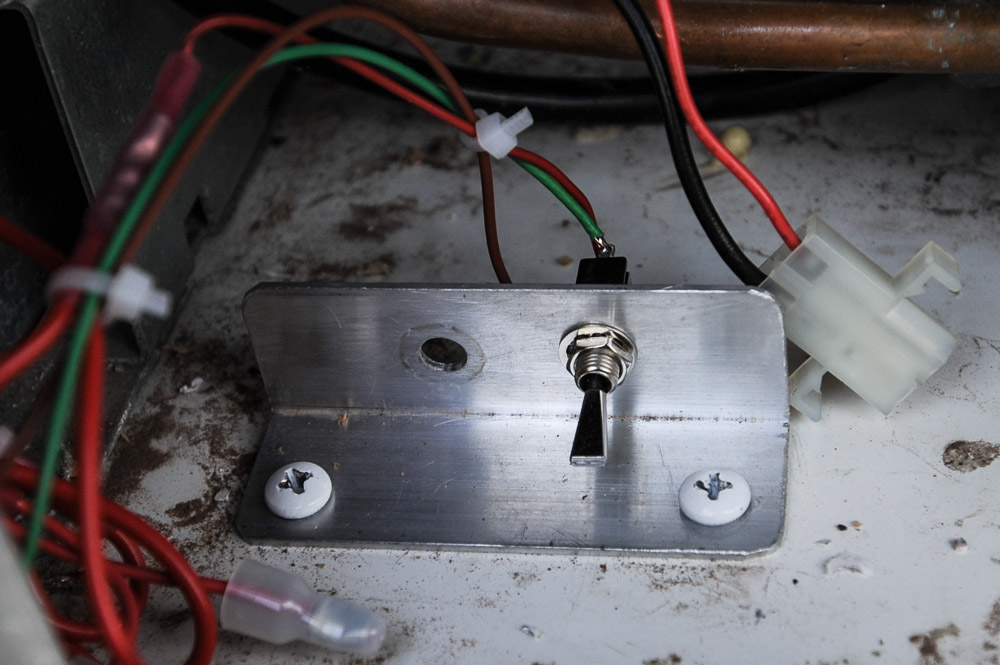
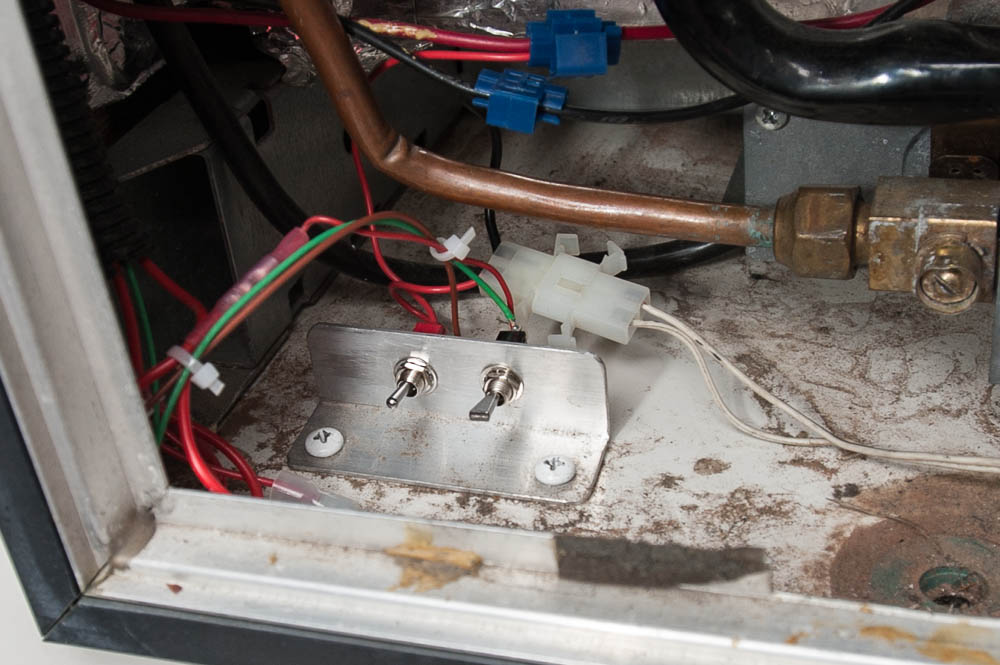
Since I often stay at parks that only have 15 amp hookups, I usually shut off the electric water heater element, particularly if I also want to try to run the AC. Because I store quite a bit of "stuff" under the bed, getting at the breaker is difficult. The switch in the water heater compartment does the job, but is inconvenient to get to. So, I added a switch next to the gas switch for the water heater. I will also add a new cover that prevents accidentally switching it off when I find or make one.
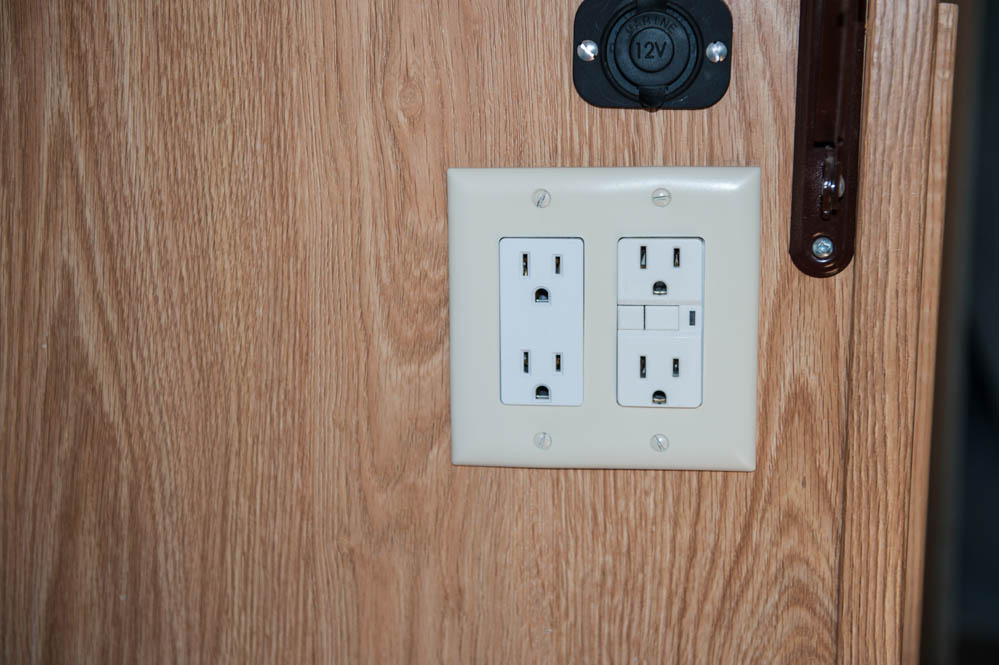
Another change was adding a duplex receptacle to the sink mounted receptacle. I don't plug any heavy loads into this receptacle, however I often need 3 outlets - Coffee maker, coffee grinder, and radio. Of course I could just wait until I grind my coffee before connecting the coffee pot, but this addition makes it easier.
The last change (for now) was to add a spice rack. I've been keeping my spices in the shallow cabinet under the sink (the one facing the wheel well) and while it works, they constantly tip over, get mixed up, and are inconvenient to get to. It is difficult to find an old fashion wall mounted spice rack, but our kitchen supply had one.
 |
 |
 |
 |
Rear Stabilizer Down |
Front Stabilizer Up |
Water Heater Switch |
Additional Outlets |
 |
|||
Spice Rack |
While on my winter trip I decided to change to a digital thermostat. The mechanical one is difficult to set to a specific temperature or read what temperature it reached.
I purchased a Honeywell RTH111 Digital Thermostat at Home Depot, one of the few non-programmable ones available. All the thermostats I've purchased in the past included an actual wiring diagram that showed the various contacts in the thermostat. Honeywell only shows the letter codes without any information on what they do. That wouldn't be a problem if one was replacing a standard thermostat since the old one would probably use the same letter codes, but the trailer thermostat was uncoded. They do have an 800 number for help, but before I called it I tried a Google search & found what letter was what. Wired it up, tried it out & everything works.
March, 2014 -
I added a page describing my new portable solar panel.
September, 2014 -
I returned from a 304 day trip around the US & Canada, and spent the first couple of weeks home making some additions & modifications that I decided to do after living in the trailer for an extended time.
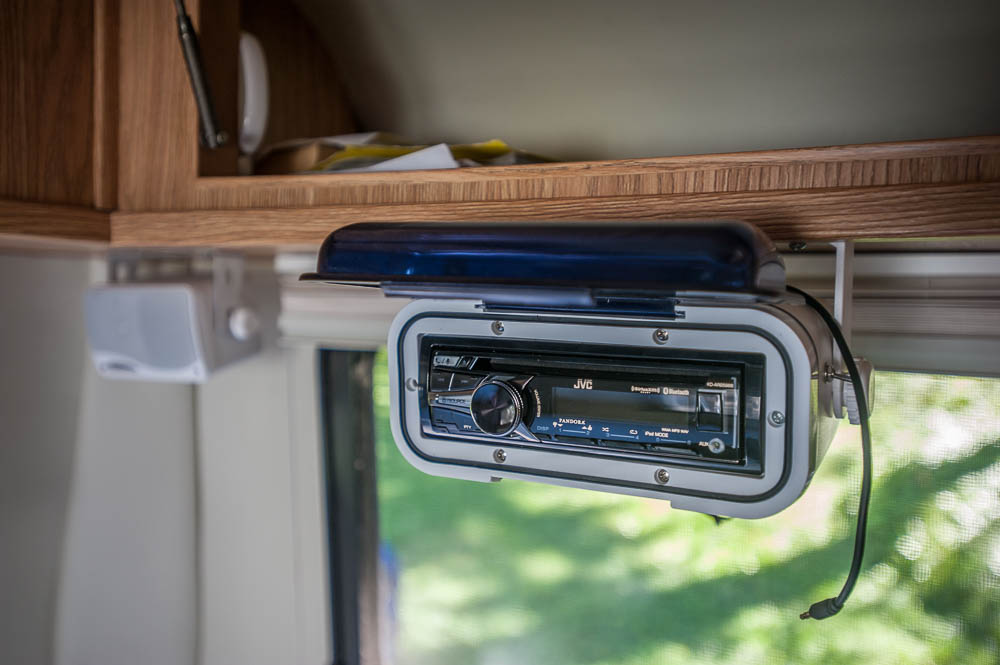
First, I finally gave up on my Sony iPhone dock. While I liked the sound quality, the FM radio section had very poor reception, and it didn't get along with my MacBookPro. It seems when ever the MacBook is on anywhere in the trailer, the IR remote receiver in the Sony dock switches between inputs every 5 minutes or so. Very annoying since I usually work on the MacBook on small dinette at the opposite end of the trailer. So, I installed a JVC Arsenal KD-AR959BS automotive type receiver. I didn't want to lose storage space in the cabinets, so it is under hung in a box designed for boats. I also under hung a pair of small speakers. While I haven't had a chance to try it out in the middle of nowhere, it does better than the Sony did with Rochester & Syracuse NPR classical stations, usually fairly weak even on the RAV4's excellent radio. The most difficult part was getting up the nerve to make a hole in the shell for the antenna!
 |
 |
The New JVC Receiver |
And the Antenna |
The next project was another hole in the shell - I added a connector for my folding solar panel that bypasses the on panel controller & feeds the input to the GoPower controller built into the trailer. I can now use the folding panel either way - with its own controller to feed an independent battery (such as the RAV4) or combine the panel with the GoPower panel on the trailer roof. The problem with using both controllers was they seemed to fight each other, each thinking the batteries were fully charged because they read the output voltage of the other controller. They would never both get out of the float mode, which made for slow charging. Even in full sun with low batteries, I would often only see an amp or two from the portable panel, which is capable of supplying as much as 8.5 amps. Since the portable panel uses automotive SAE connectors, that is what I used with the trailer connection so I can use the same cords for either mode of charging. Connectors came from SolarSeller.com.
 |
SAE Connector For Solar |
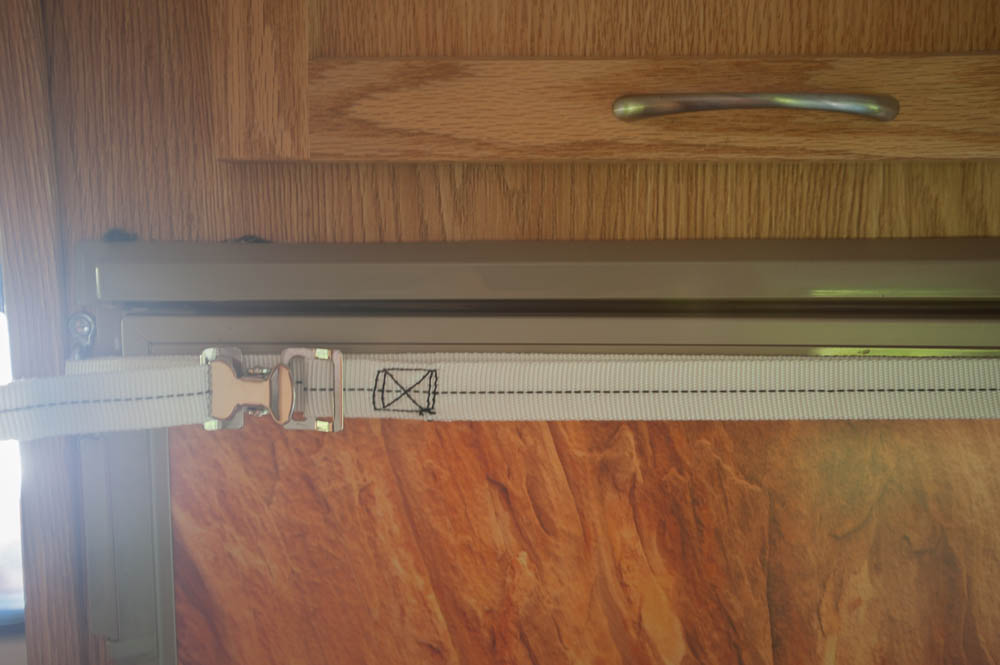
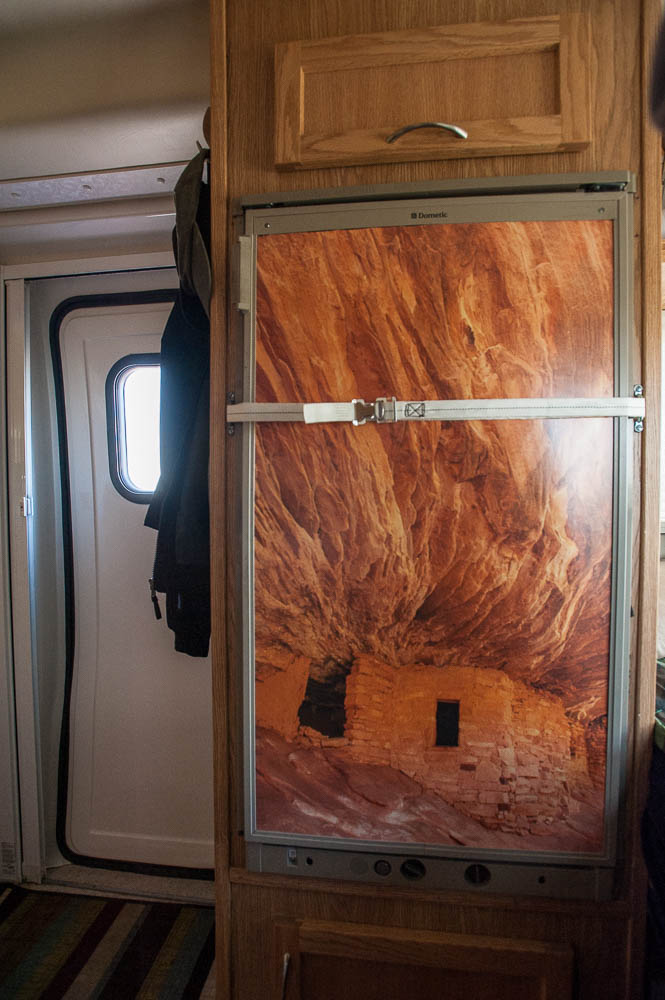
The last two modifications at this time was on the refrigerator. While I have not had the problem, a couple of people on the Escape Forum have had their refrigerator door open while traveling. As you can guess, this makes quite a mess, as well as the loss of the stored food. So, I added a strap that will assist the normal latch while traveling. (If you have sharp eyes, you will notice the strap moved in the full (second) photo. I moved the strap more towards the middle after the first photo was taken.) The other modification was to add a photo to the door. I saw this at one of the west coast fiberglass trailer rallies, and my prize winning photo (The New York State Fair & the Casita Club Forum) of House on Fire at Mule Valley in Utah makes a good mural. I had a custom sized, laminated print made by PosterBrain.
 |
 |
Door Strap |
Poster Photo For Refrigerator Door |
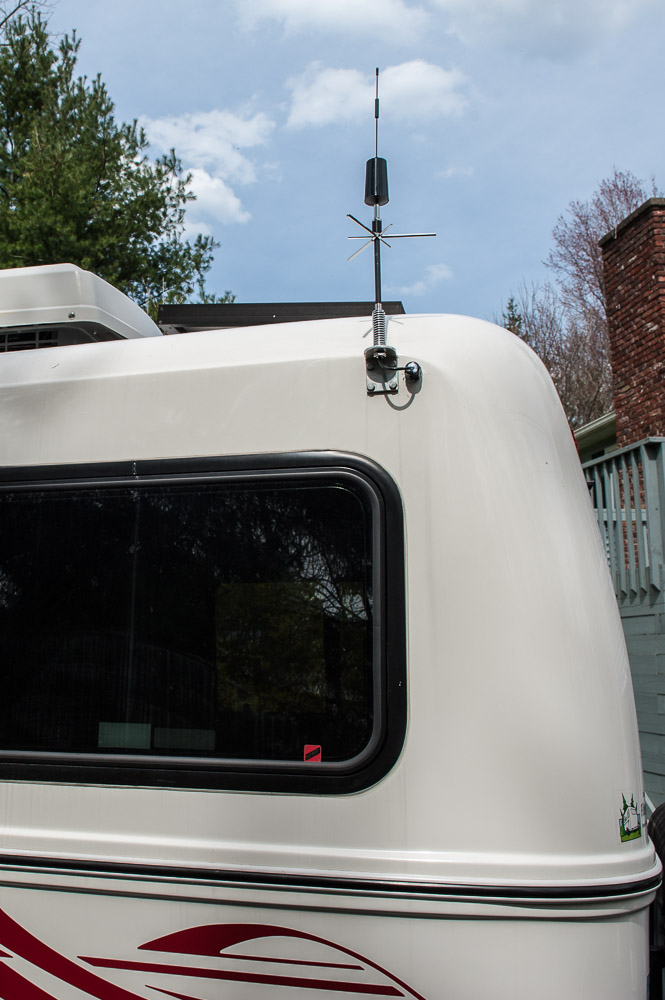
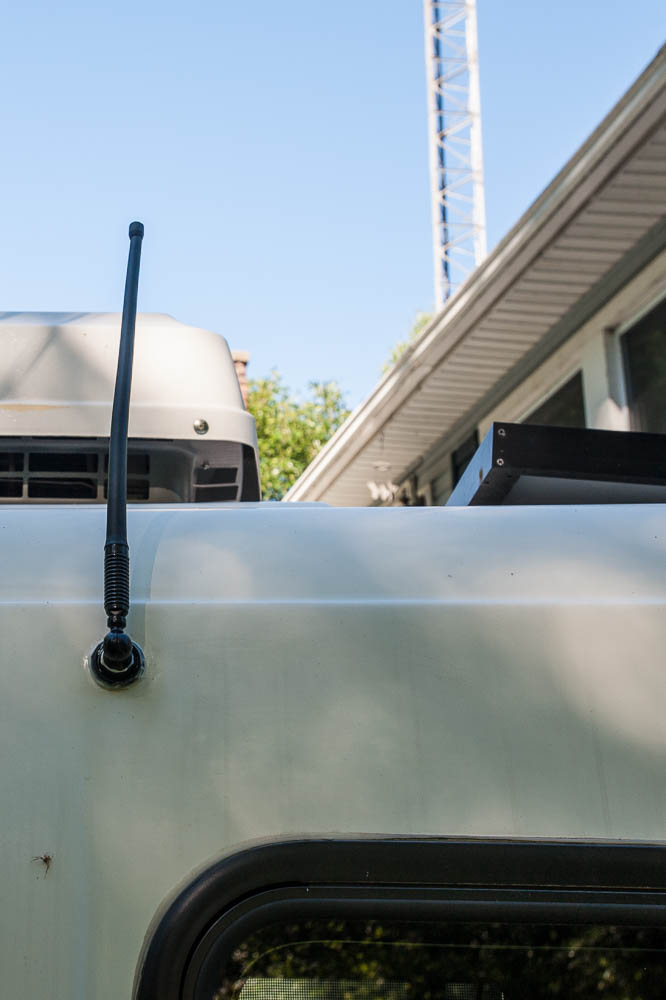
Another change was to remove the TV antenna and replace it with an XM Radio antenna. I prefer to read, and rarely watch TV (1 day at a campground that had TV hookups on my last trip). I do like to listen to NPR, and a wide variety of music (basically anything but country). While I've been able to use either the FM radio or Pandora on my iPhone, there are many parts of the country (particularly the southwest) that are out of reach of FM stations (except country, or religious) and a Verizon cell connection. That, and while driving is where the XM Radio fills in. I had a standard XM Radio antenna glued to the fiberglass roof in the rear cabinet, however the AC blocked the signal unless I had a campsite that let the rear of the trailer face south. I could put out another antenna under those situations, but that got to be a pain.
So, I went looking, and found a Tram exterior marine antenna. I pulled the TV antenna & used the mast to mount the XM antenna. The tiny antenna on top of the TV mast looks a little silly, but it is high enough that it is likely to clear the AC; we will find out for sure on the next trip.
Well, after a couple of weeks using the new antenna, I can say it is far better than the one I had glued to the inside of the trailer, however heavy leaf cover still blocks the signal.
 |
 |
Tram XM Radio Antenna |
Tram XM Radio Antenna |
I carried a very nice, lightweight aluminum 2 step ladder in the back of the RAV4 on my last trip. While it was useful, with only two steps, it was difficult to get to the top of the trailer. I found a 5' folding step ladder at Amazon. It fits in a 5" plastic fence post (like I use to hold the sewer hose), so now there are two fence posts under the back of the trailer. By the way, while I ended up with a single sided ladder, Amazon now has a 2 sided 5' Ladder (and for less $ but much heavier) that I would have purchased it it was available.
 |
5" Fence Posts for Sewer & Ladder |
I also changed the tapered mattress topper - after almost a year of use it is a bit soft.
I'm not even going to pretend that I'm done making changes in the trailer. Don't get me wrong - it is not because of inadequacies of the Escape company. All of the modifications have been done because I like to tinker, or because I travel for months at a time & making the changes make life more comfortable for me. So, here is what I've started on this Spring:
Minor changes include changing out the under sink water filter, finding a smaller Bonavita hotpot for making tea when I have hookups (or, since it is only 900 watts, when I have good sun with the inverter), a new silverware insert for the kitchen drawer, a Primus non electric single slice toaster, and modified my Hopkins lighted level so that it has a standard off /on switch & is powered by a rechargeable Li-ion battery. No more replacing a pair of coin batteries that cost more than the level when I forget to shut it off!
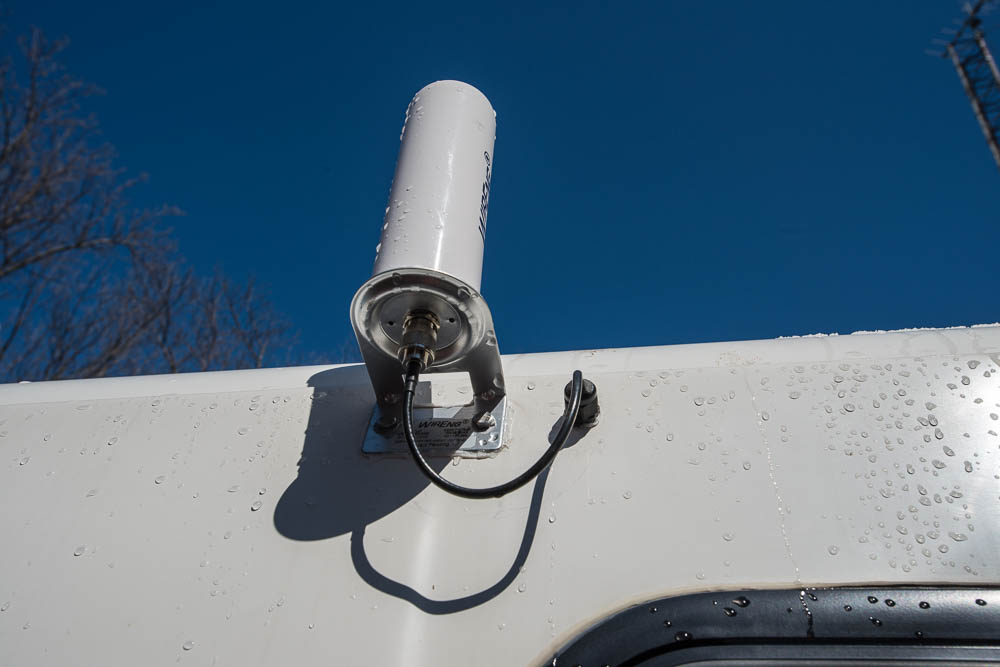
As to major changes and additions, first I changed the location of the FM radio antenna (and changed the antenna itself to an amplified version). The problem was the cell phone antenna cable ran parallel to the radio antenna for a couple of feet inside the upper cabinets. This caused the FM radio to blank on distant stations when ever the Verizon hotspot was in use. Since I listened to the radio while working on the computer, this needed to be fixed. At the same time I changed the Wilson short trucker antenna to a WireNg Marine cell antenna. The reason - the Wilson antenna is permanently attached to the cable, making it difficult to remove when placing the winter cover on the trailer. The WireNg antenna has a plastic cover that won't poke through the cover; even if this is still a problem, the cable disconnects from the antenna so I could remove it if necessary. Another advantage is it has a bit more gain than the Wilson antenna.
 |
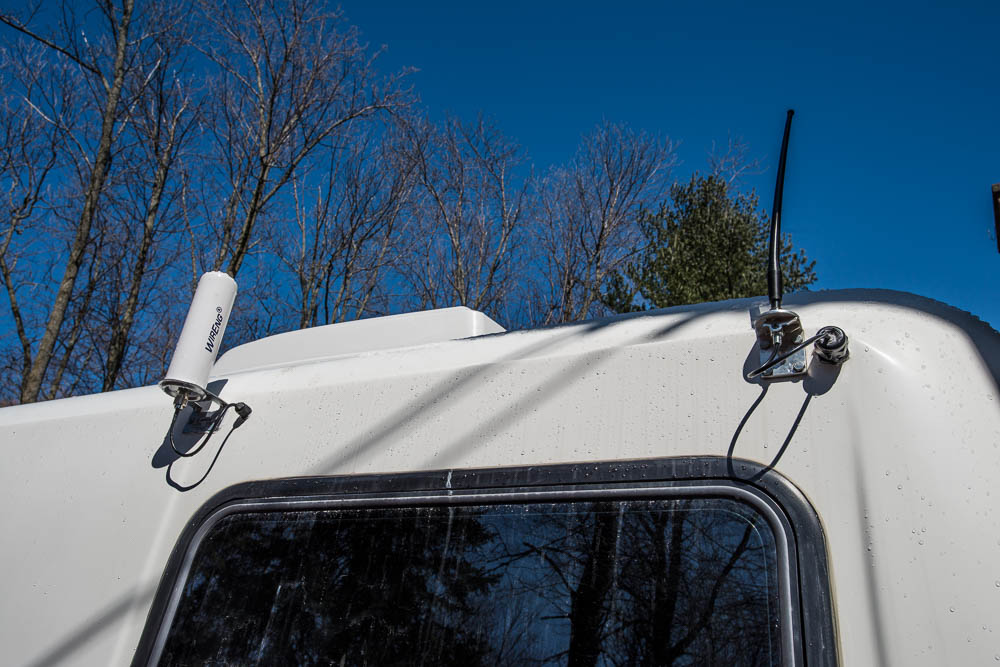 |
WireNg Cell Antenna |
Both Antennas |
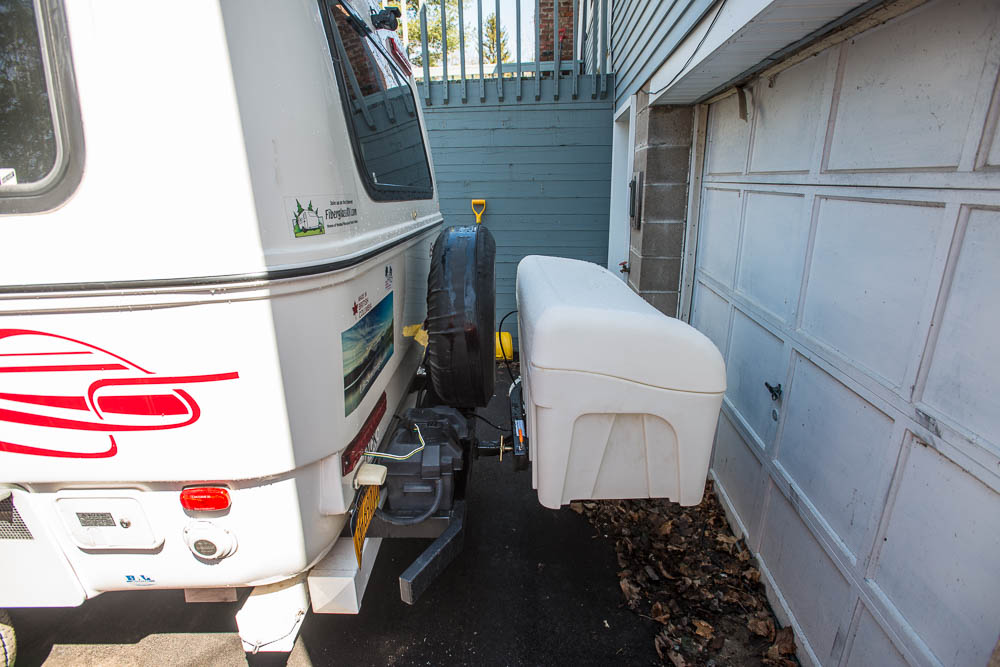
Not content with drilling holes for the antennas, I drilled another one for the lights added to my StowAway 2 carrier. I debated on adding the carrier since there is a fair amount of storage already in the trailer. The problem is I wanted additional outside storage for a small propane tank for my grills, a spare gas can for dealing with the combination of long distances between stations, a small 15 gallon gas tank in the RAV4, and well under 15 MPG when I have a headwind. I can't put much in the carrier since it subtracts from tongue weight, and there is a weight limit on the rear hitch. Still, it does solve some problems. According to Stowaway, their standard mount would not allow me to open the top (the spare tire would be in the way) without an extension. They suggested the swing away version which I ordered. After adding it, I found that I could open the top part way, maybe enough that I really didn't need the swing away version, but that is what I have. The swing away parts add 35 lbs to the overall weight so if you are thinking of getting one, I'd try the standard mount.
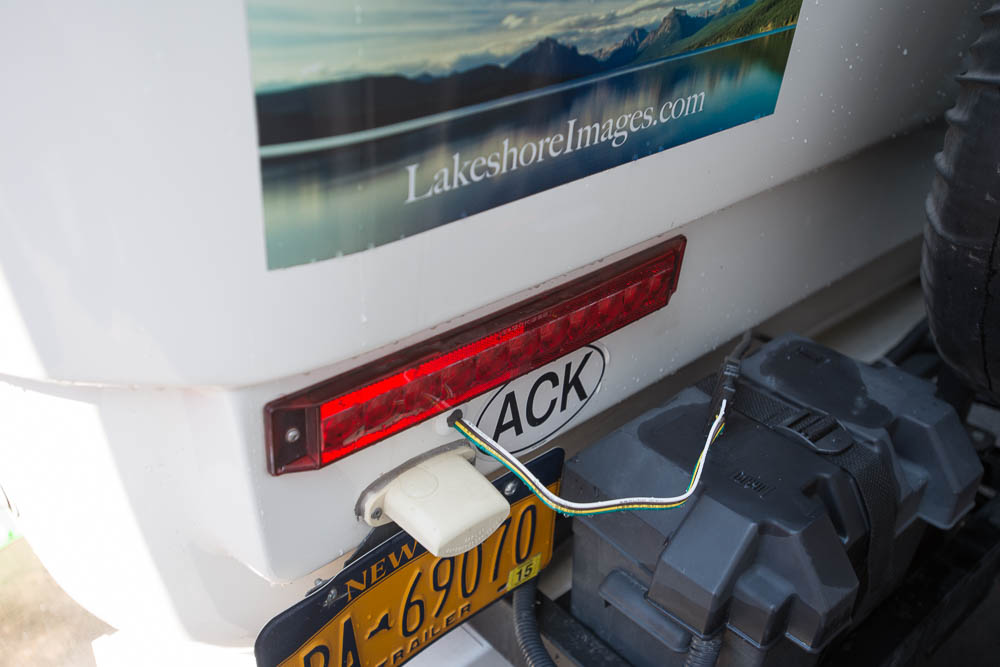 |
 |
 |
4 Pin Plug for Carrier Lights |
Stowaway 2 Cargo Carrier |
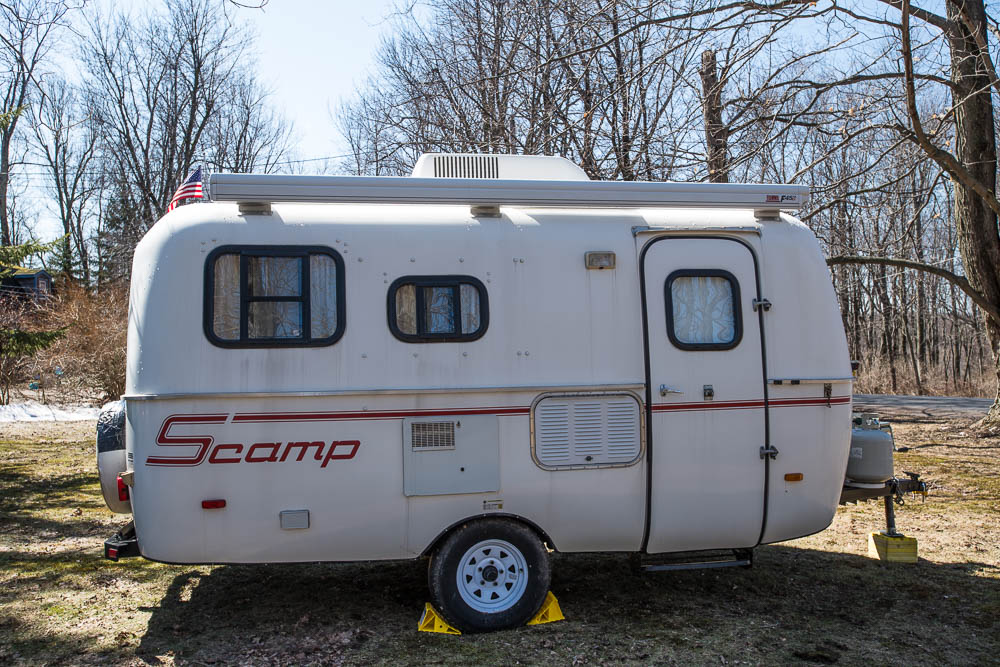
2010 Scamp 16 |
Lastly (so far) I added another trailer, a Scamp 16. Just kidding, although one is sitting in my front yard. Friends are going to Alaska with me in June, and they would rather travel in a trailer than a tent. They have been looking for a used trailer for the last couple of months, and the Scamp was available in Ontario, Canada at a good price because of the current exchange rate, so they are now the proud owners of a 2010 Scamp 16 (Layout 4).
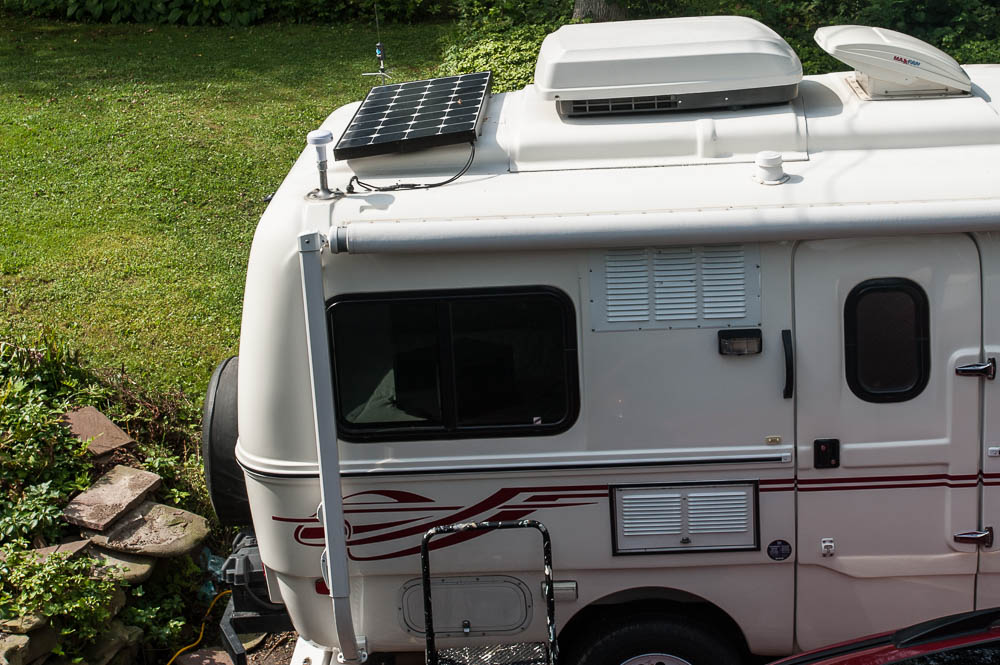
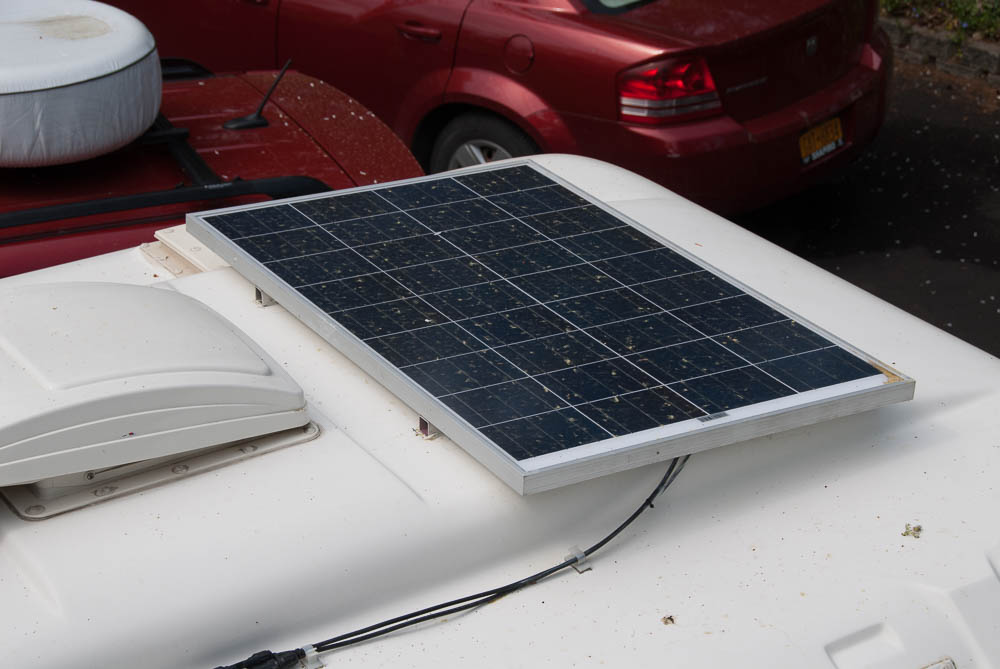
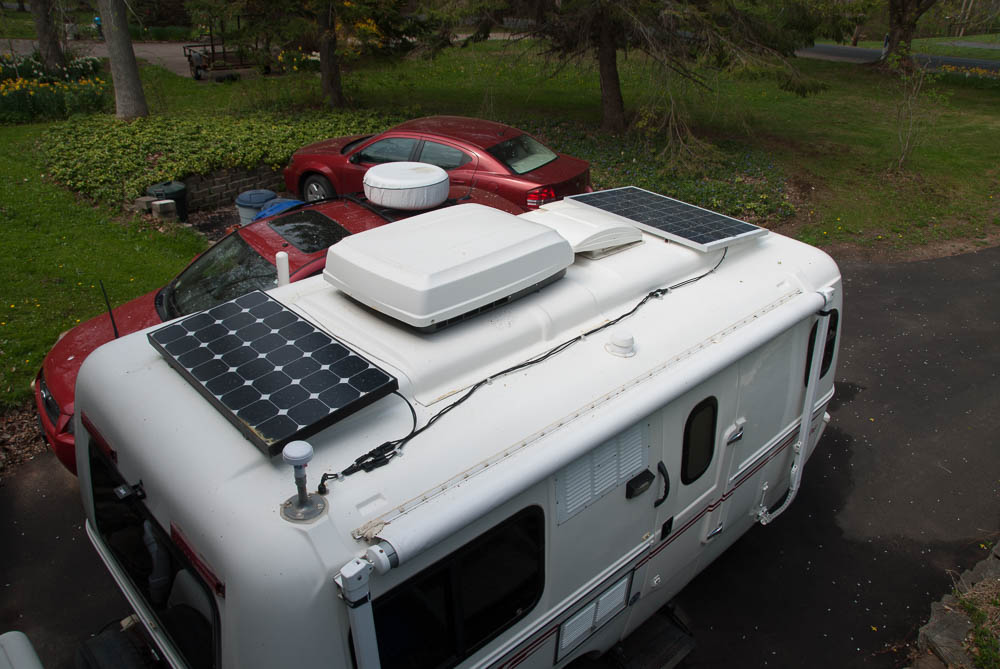
I thought I had already posted photos of my additional solar panel, but since they are not here, I'll add them. I found the 95 watt panel supplied by Escape in 2011 (they now supply a 150 watt) was not adequate for my camping style, so I added a portable 160 watt panel during my 2013-2014 trip. Adding that works well, however I dislike having to get it out, set it up, and worrying about leaving it out when I'm away from the trailer. So, I added a 100 watt panel to the front of the trailer. Since I can still plug the portable panel into the input of the GoPower controller, I now have a choice of 195 watts on the trailer & 355 watts if I want to dig out the portable (or, 160 watts if parked with the roof of the trailer shaded).
 |
 |
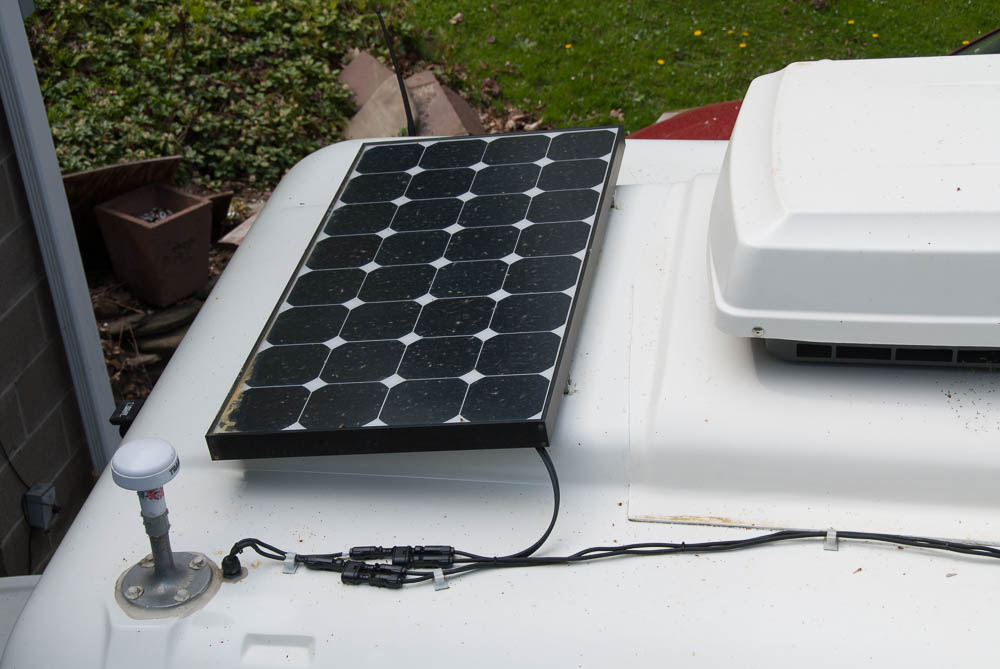 |
The New 100 Watt Panel |
Both Panels |
The Wiring For Both Panels |
A couple of modifications this September - during a late July stop at Chilliwack, BC, Escape Trailer Industries replaced one of my upper taillights that failed. At that time they gave me part of a set of solar panel tie downs that they were sending to all panel owners. The cable parts had not yet arrived, so they sent them once I stopped at a place long enough to receive them. About a week after I left Chilliwack, the other upper taillight failed, so I had them sent one along with the tie down cables. No photographs of the new taillight - looks just like the old one!
So, my latest project was to replace the taillight & add the tie downs. Even though Escape only provided one of my solar panels, they were kind enough to include kits for both my panels. They provided a unique rivet to attach the cable to the fiberglass - a blind, expanding rivet that expands by hitting it with a hammer. The problem is the fiberglass was too thick for the supplied rivet in most of the locations required by the length of the cables. Because the area the rivets are located is in an air space in the vertical section of the roof, they don't show from the inside of the trailer. I had to use standard pop rivets for 6 of the 8 locations. After a couple of dabs of ProFlex RV sealant, the job was done.
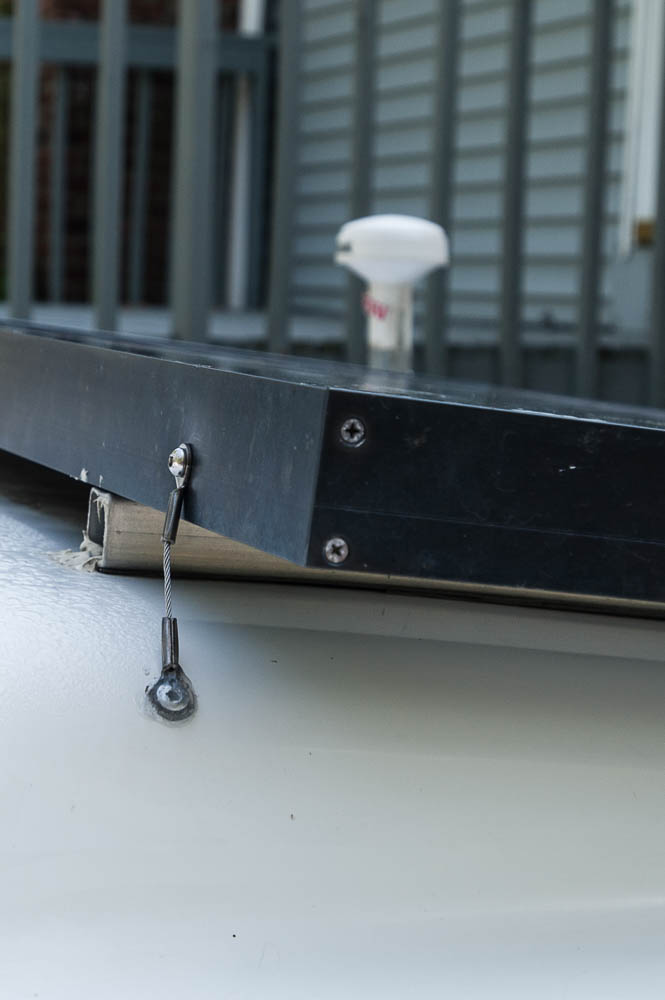 |
Solar Panel Safety Cables |
You would think that after 5 years of owning my Escape 17B, I'd be done with changes, additions & modifications, but it doesn't work that way. While none of these were necessary, they make using the trailer more comfortable, so why not?
The first happened while I was in the LTVA (Long Term Visitor's Area) in Quartzsite, AZ. I spent the winter dry camping in the desert. My refrigerator door fell off when I opened it wide to reach something in the back. The lower right hinge cracked, allowing the hinge pin to drop low enough so that the upper pin came out of the door. I managed to temporarily repair it, but needed to replace the lower hinge. Luckily, there was a RV supplier in Quartzsite that ordered the part - a 5 minute job.
After getting back to Oswego, I replaced the GoPower solar controller with a Blue Skies Sun Charger 30. While the GoPower controller was still working, the advantage of the Blue Skies controller is it can be adjusted to match the charging specifications of my Interstate U2200 batteries. They charge at a higher voltage than most 6V batteries, and without an adjustable charge controller, were rarely capable or reaching a full charge.
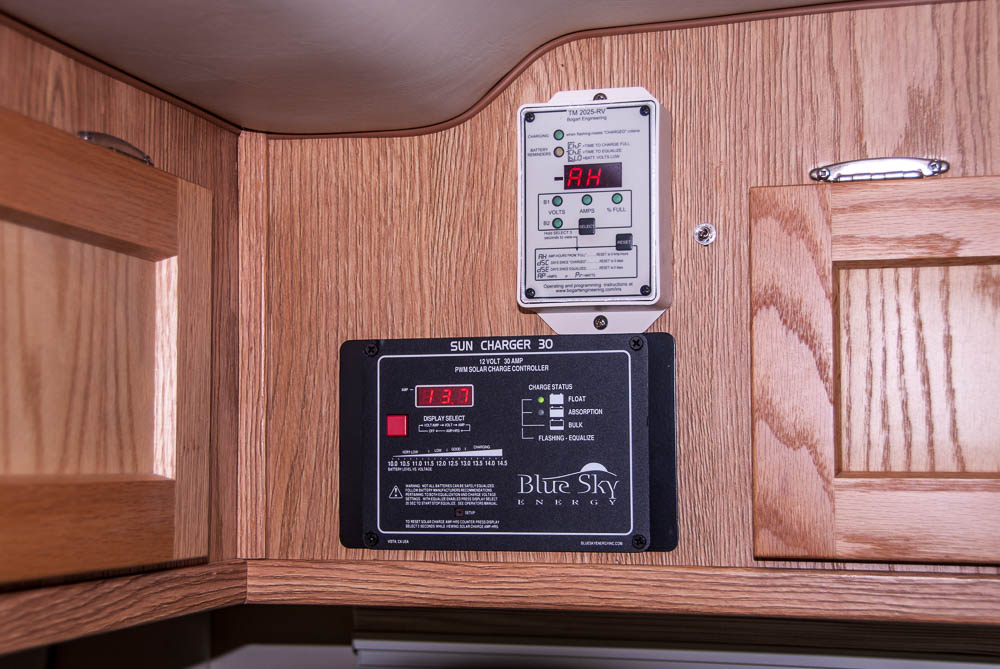 |
| Blue Skies Sun Charger 30 |
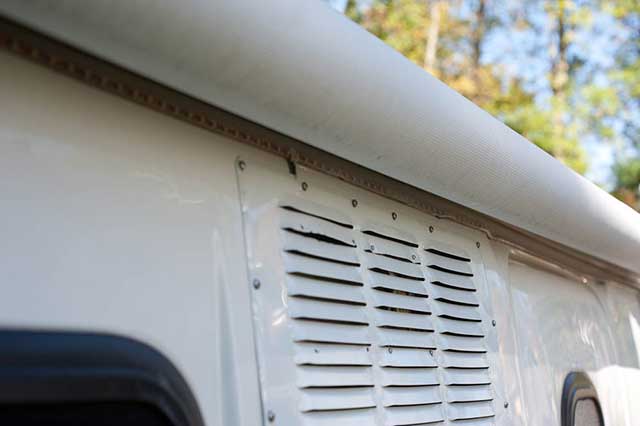
The next addition was a somewhat involved project - to replace the non powered bathroom vent with a powered vent. The original vent was getting sun hardened & yellowed , had been through two re caulking for leaks, and Escape had a kit that included fiberglass adapters to go from the 10" hole to the 6" power vent. The vent kit does not come with instructions, so I did a separate page with photos of the steps so others could follow along or learn from my mistakes. Link to vent install.
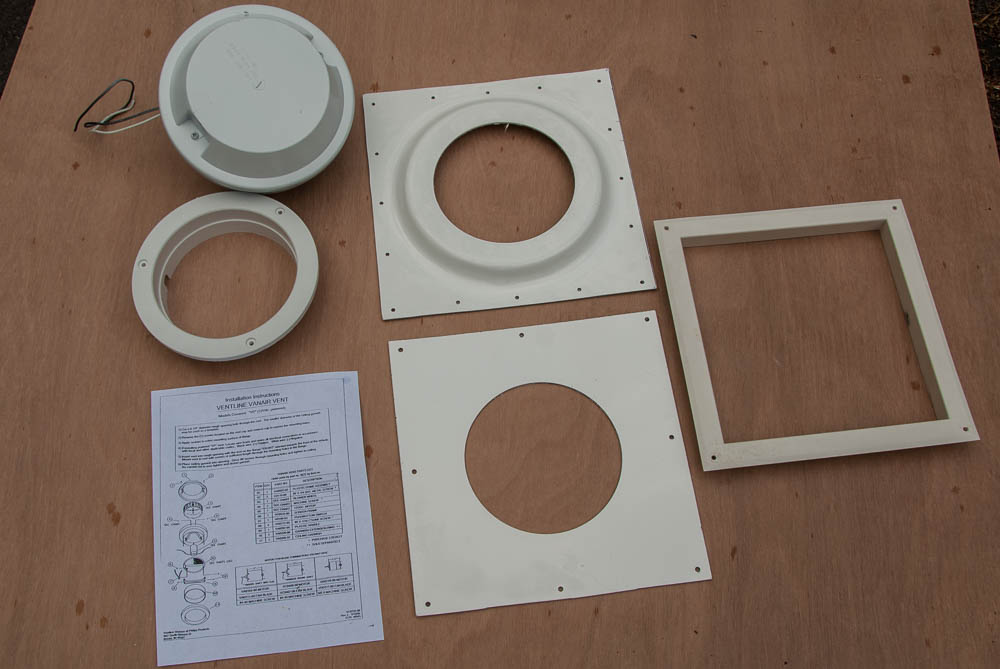 |
| Vent Replacement Kit |
That's it so far, but 2016 isn't over!
I did change the rear view camera from the wired version from Rear View Safety I used with the RAV4 to a wireless version from the Tadi Brothers. While I prefer the wired version, it was more difficult to run wiring between the dash & the rear of the truck than it was for the RAV4 (or I'm getting lazier). The picture is better with the wired version; the wireless exhibits a bit of noise. In any case, it is far easier to hook up.
The first mirror mounted monitor they sent was too reflective. I understand that some want to use it for both a camera and a mirror, but I don't need the mirror feature since I'll only add it when the trailer is connected (the truck already has a back up camera). They were very nice about finding a replacement that was less reflective & we traded monitors. I did rewire an older 5" monitor to work with the wireless system just in case the new monitor is still too shiny.
I also added the brake controller to the Tacoma. Much easier than the RAV4 since there was a cable harness already run for the 7 pin connector. All I needed is an adapter from eTrailer to connect the controller to the harness.
It was a bit difficult finding a place for the Tekonsha Prodigy P3 Trailer Brake Controller - I didn't want it under the dash since it would either get in the way of my knees or the air bags. There is a small "cubby" to the left of the steering wheel that, with some serious pushing, fits & holds the controller.
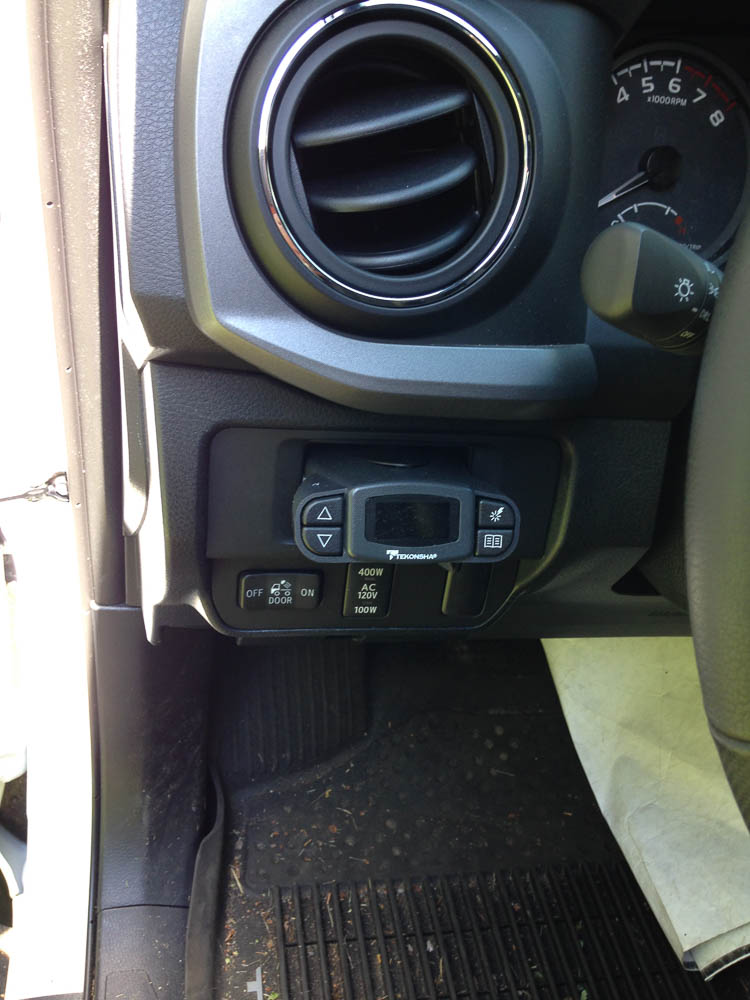 |
| Tekonsha Prodigy P3 Trailer Brake Controller |
This page is maintained by: vermilye@oswego.edu
Last Update:
January 8, 2018